Connecting ChatGPT
Custom MCP connectors require Developer mode, which is available on Free, Plus, Pro, Business, Enterprise, and Education accounts on the ChatGPT web app.
Turn on Developer mode
-
In ChatGPT, go to Settings → Security and login, then switch on Developer mode.
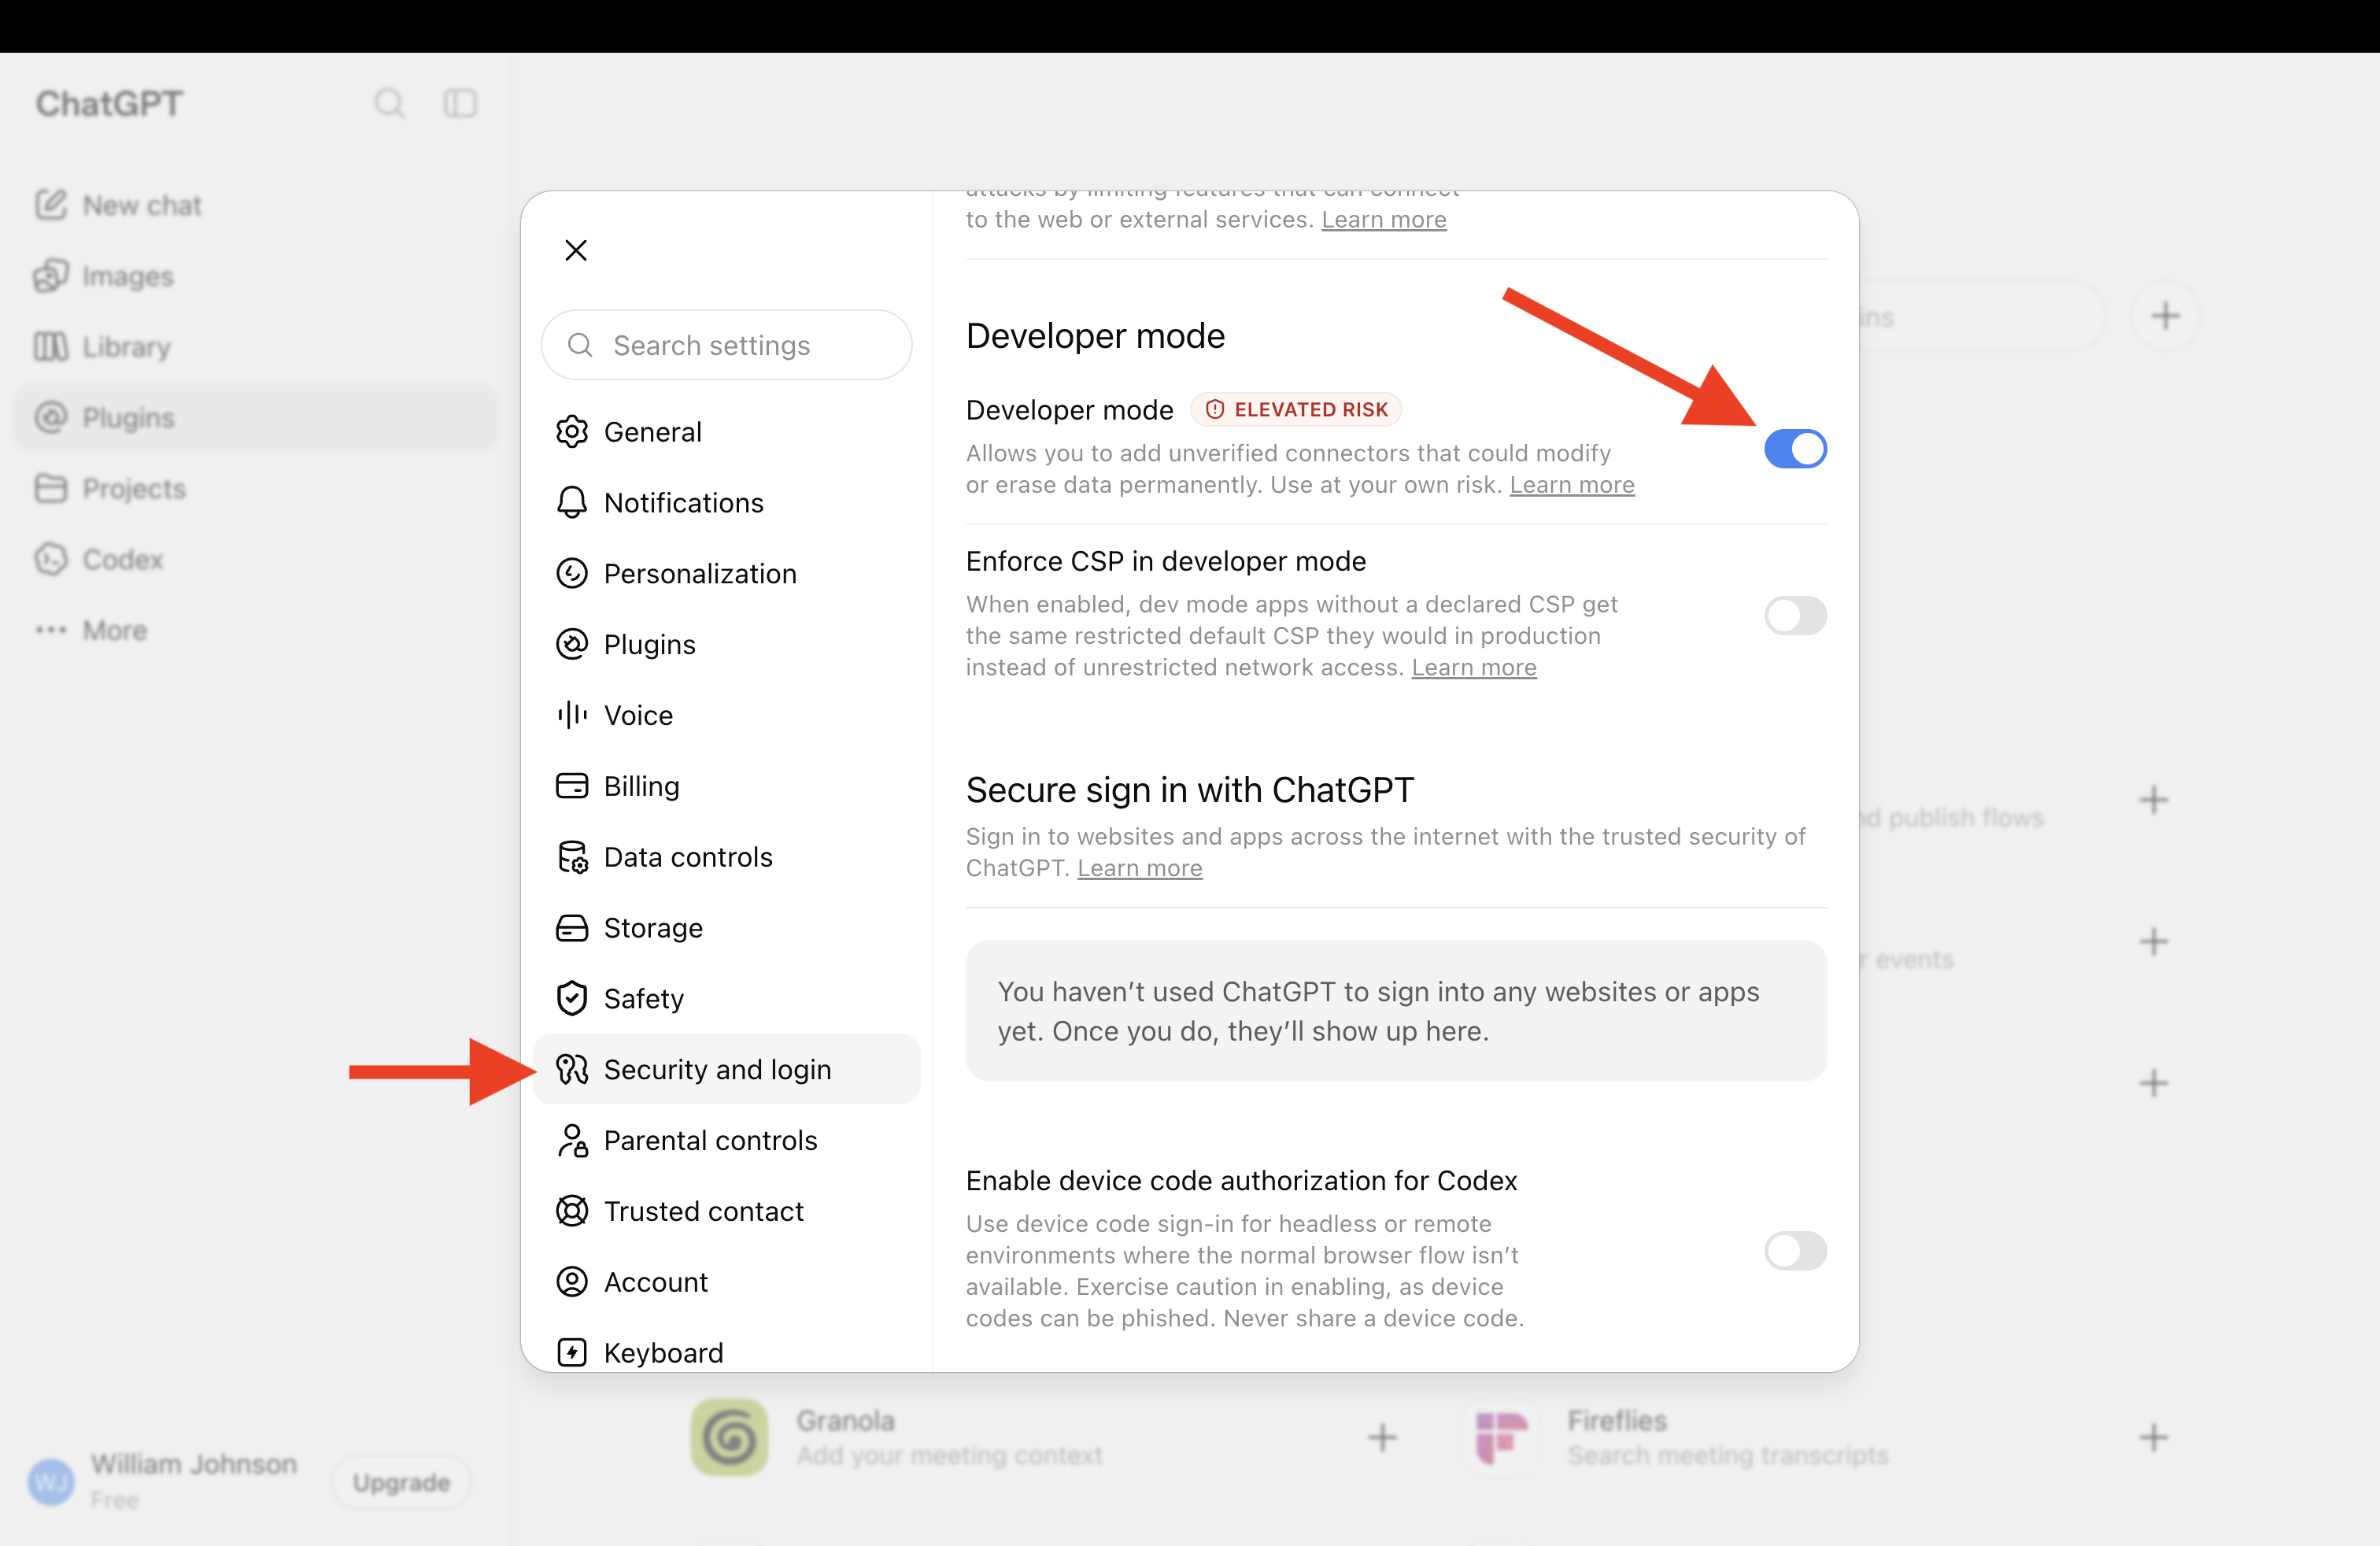
An admin may need to allow this first under Workspace Settings → Permissions & Roles → Connected Data → Create custom MCP connectors.
Add ScheduleLord as a custom connector
-
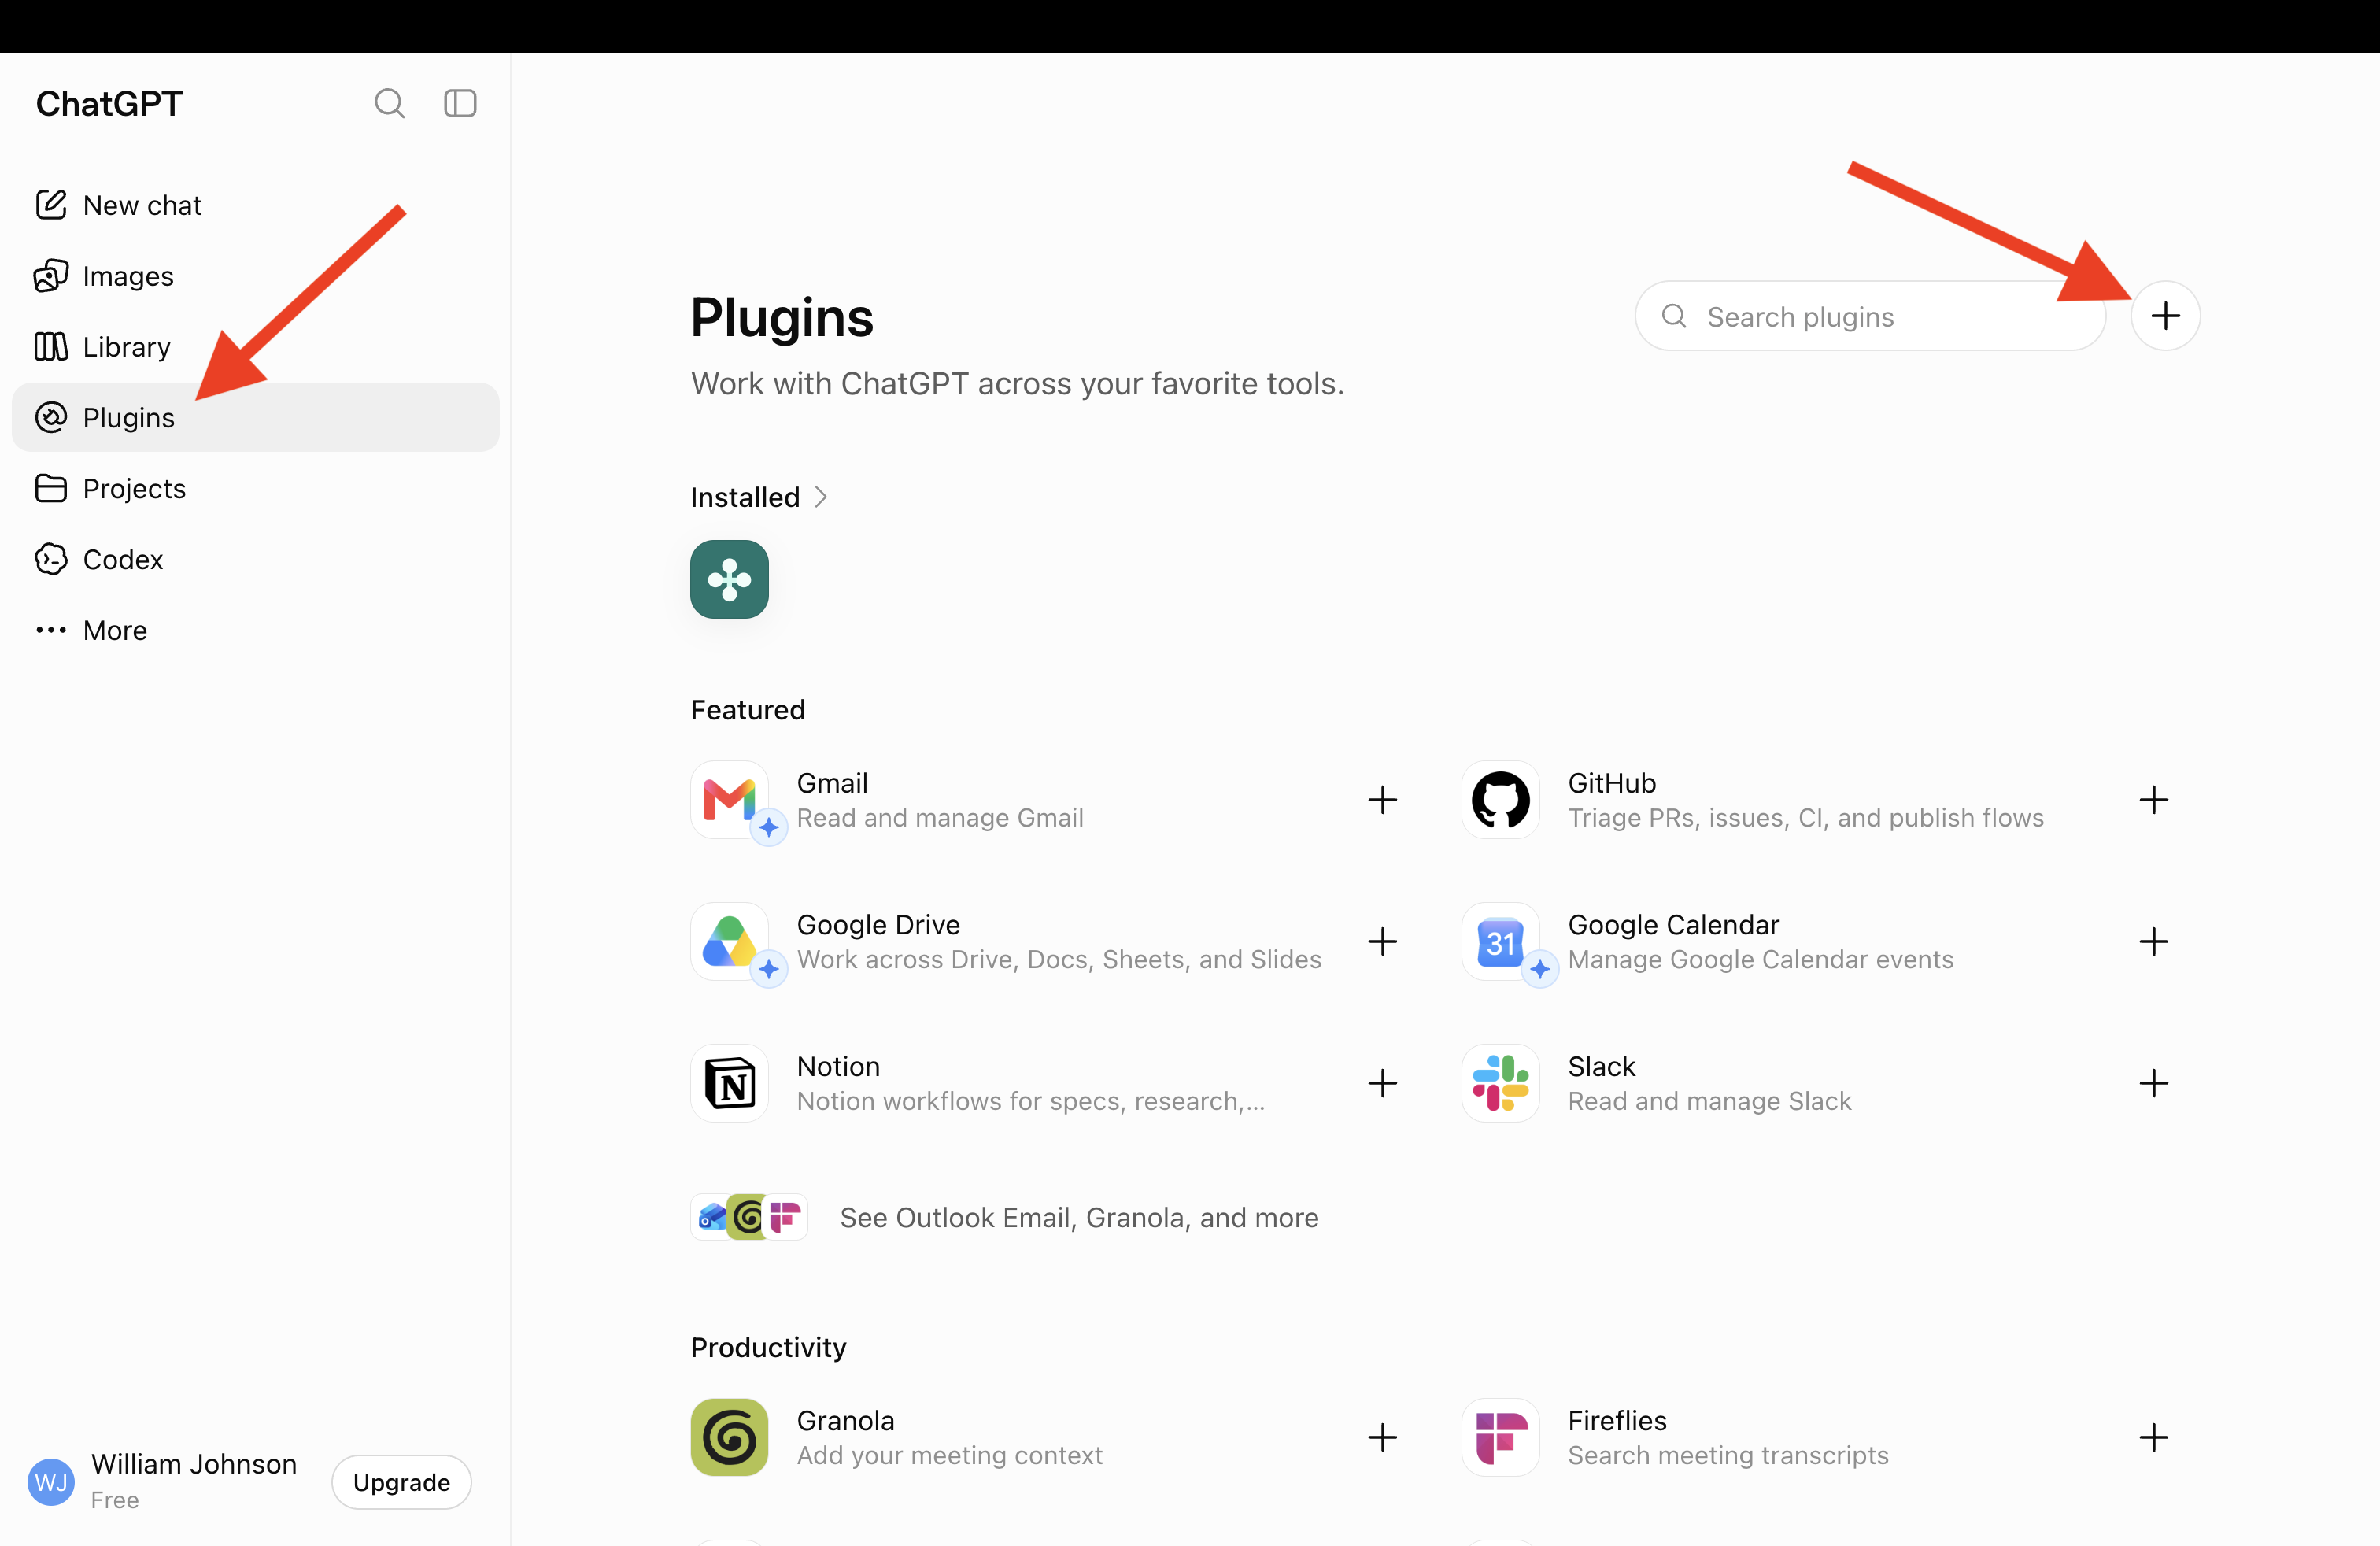
Go to Plugins in the sidebar and click the + button next to the search box.
-
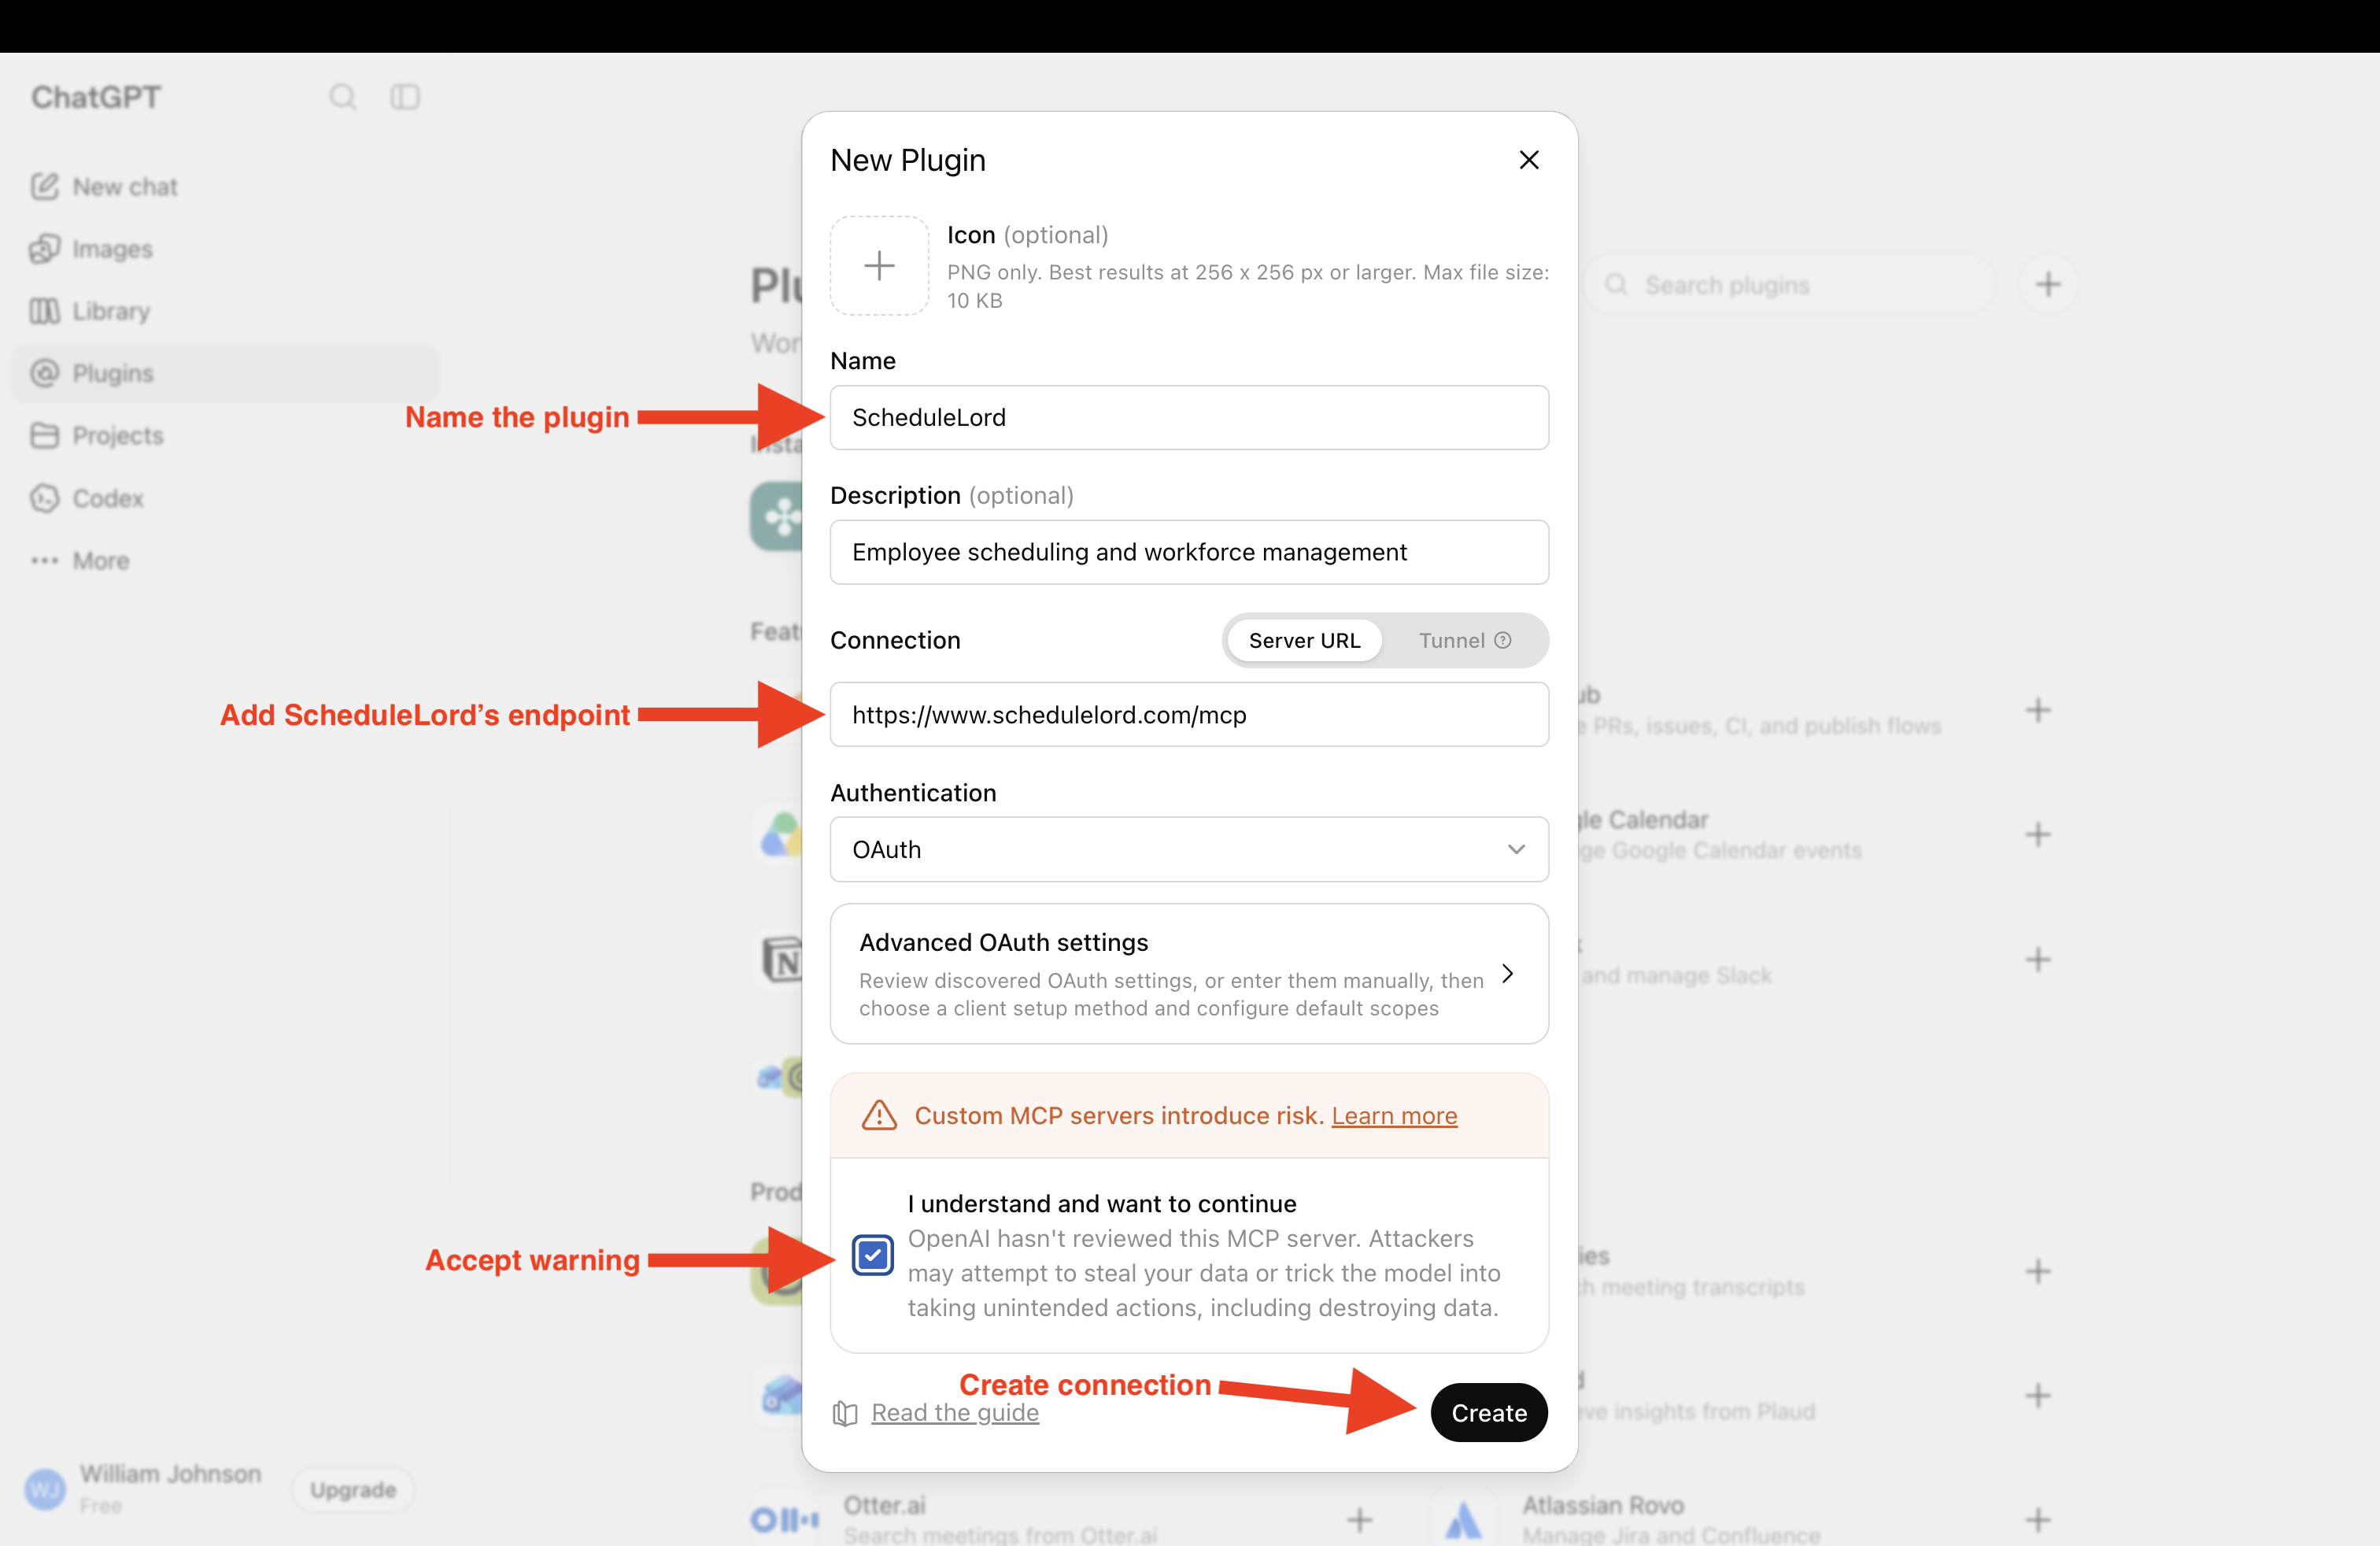
Fill in the connector details and click Create:
- Name: ScheduleLord
- Description: Employee scheduling and workforce management
- Connection → Server URL:
https://www.schedulelord.com/mcp
- Authentication: OAuth
- Check I understand and want to continue
Connect and grant access
-
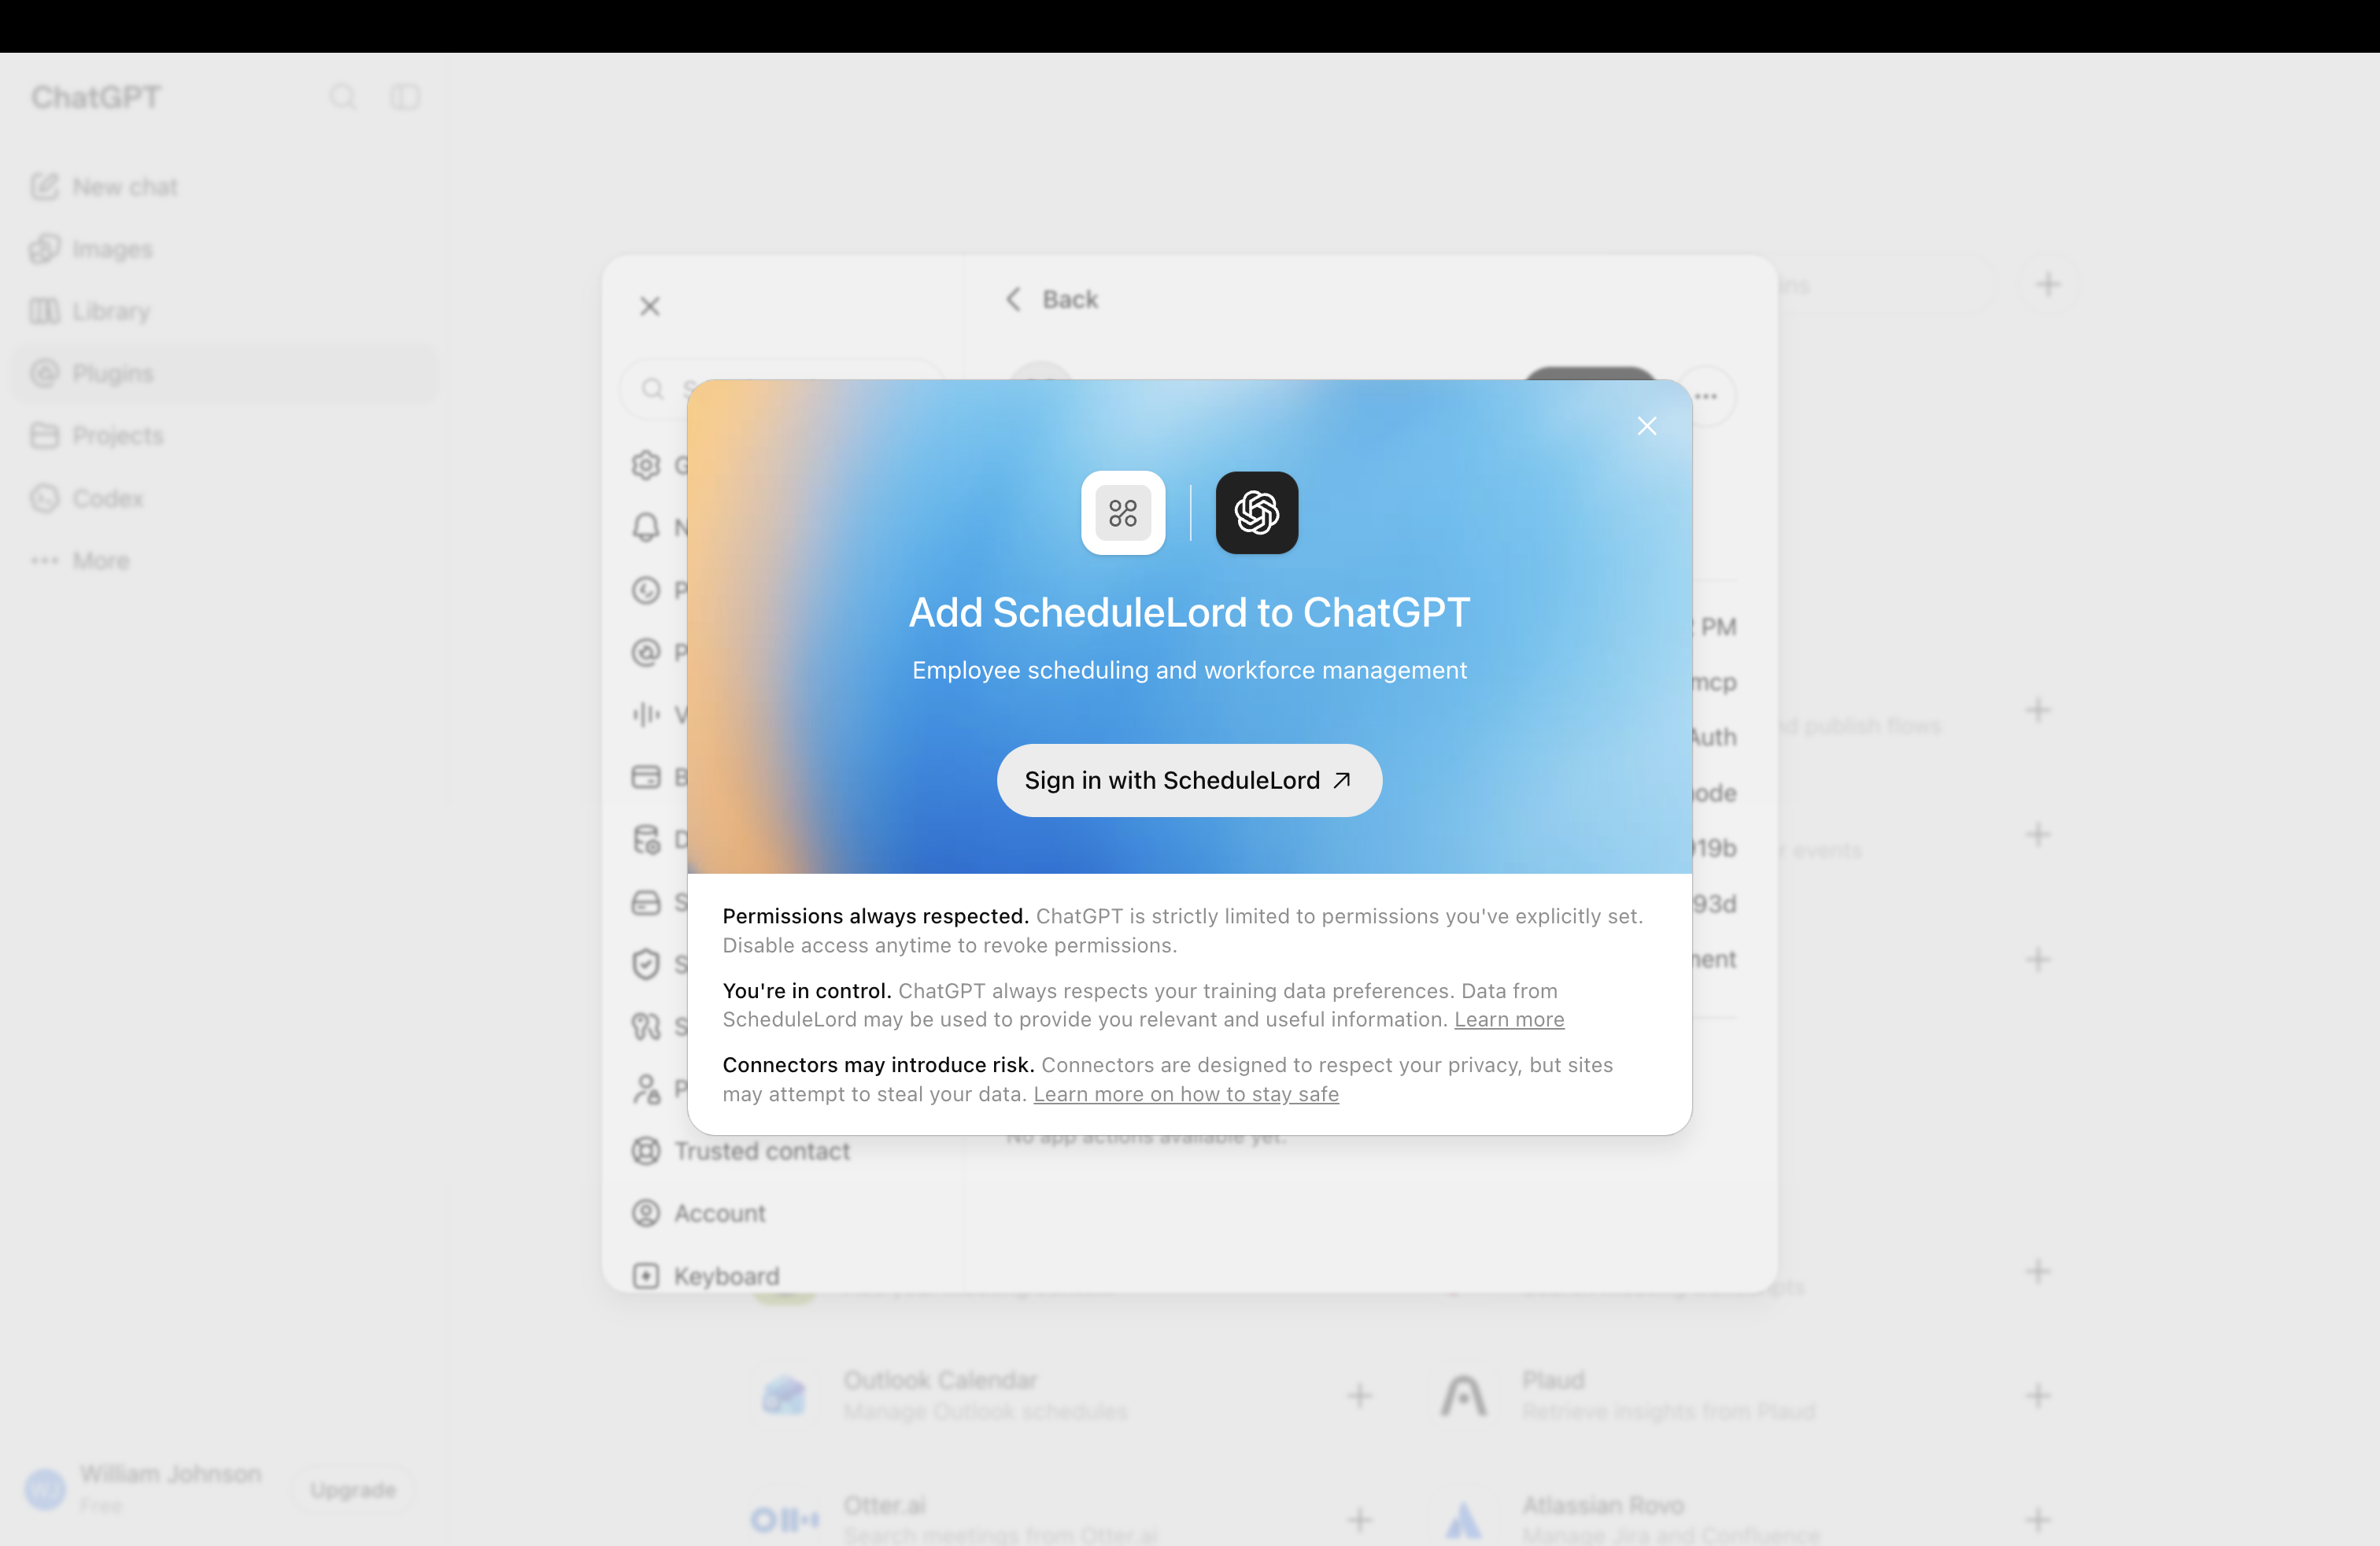
Click Sign in with ScheduleLord.
-
ChatGPT will open ScheduleLord's authorization page. Sign in with your passkey to grant access.
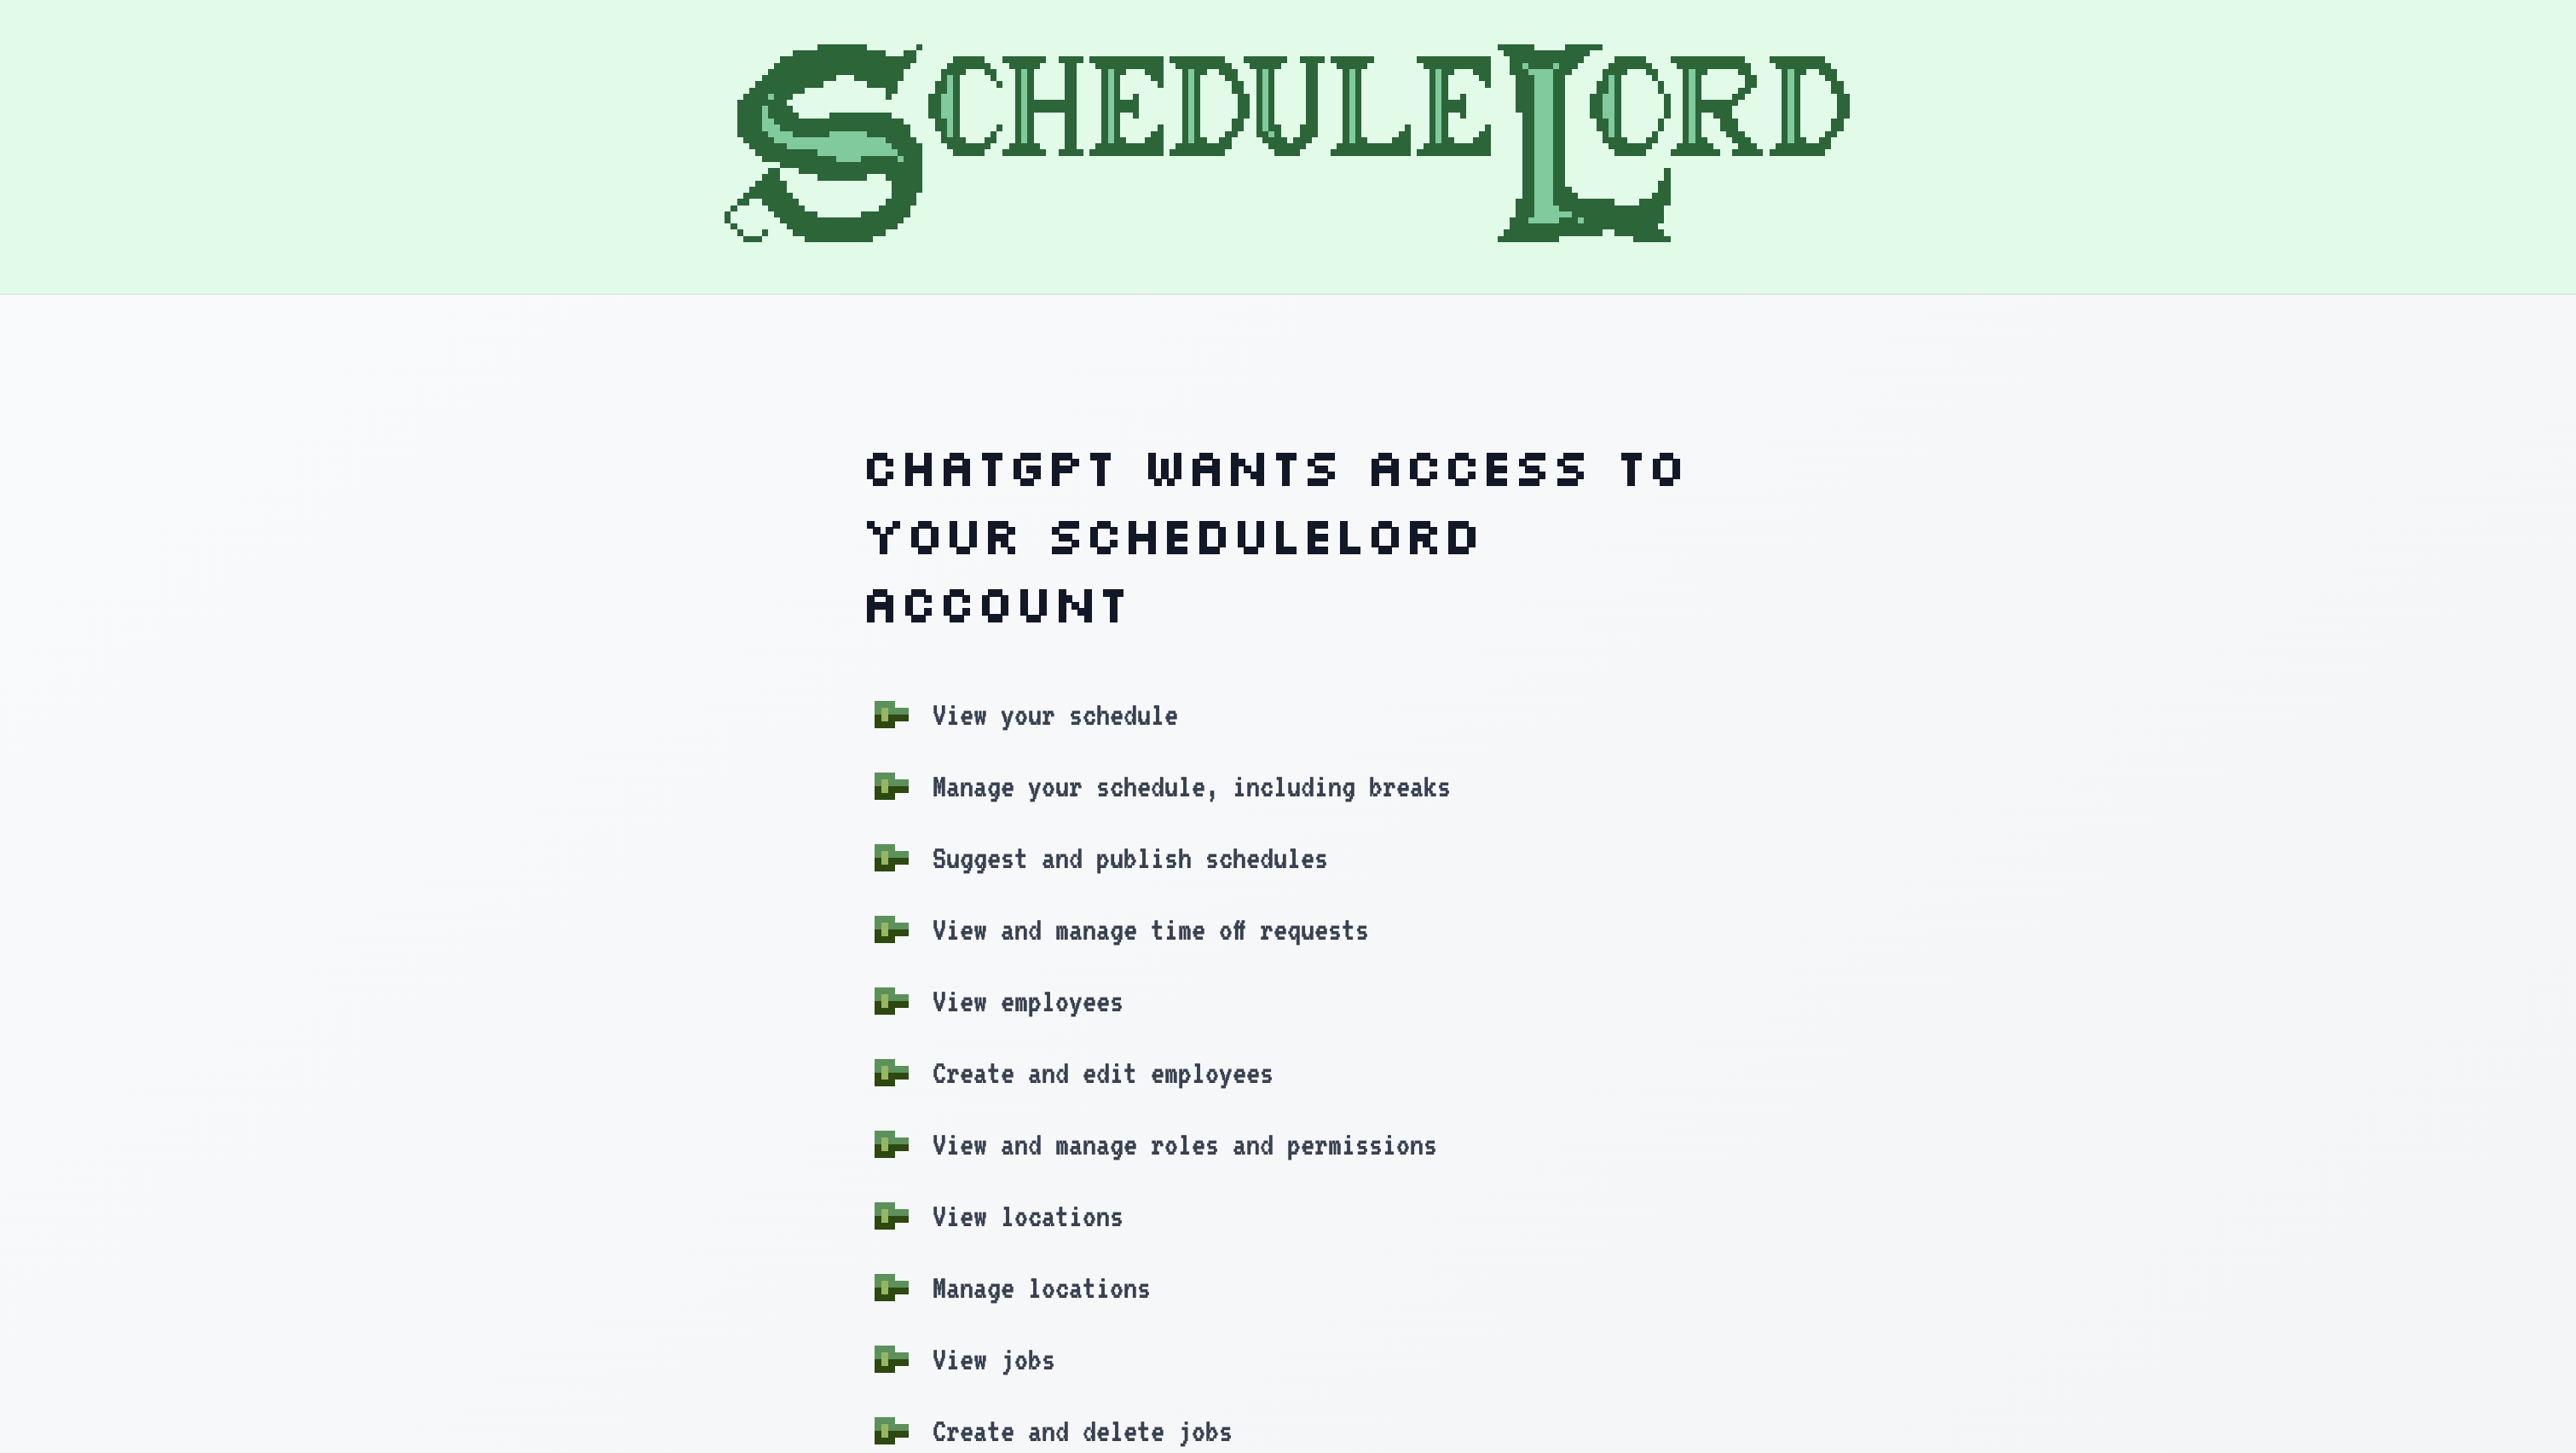
You'll be sent back to ChatGPT, now connected to your ScheduleLord account. This is the same consent screen covered in Client Registration.
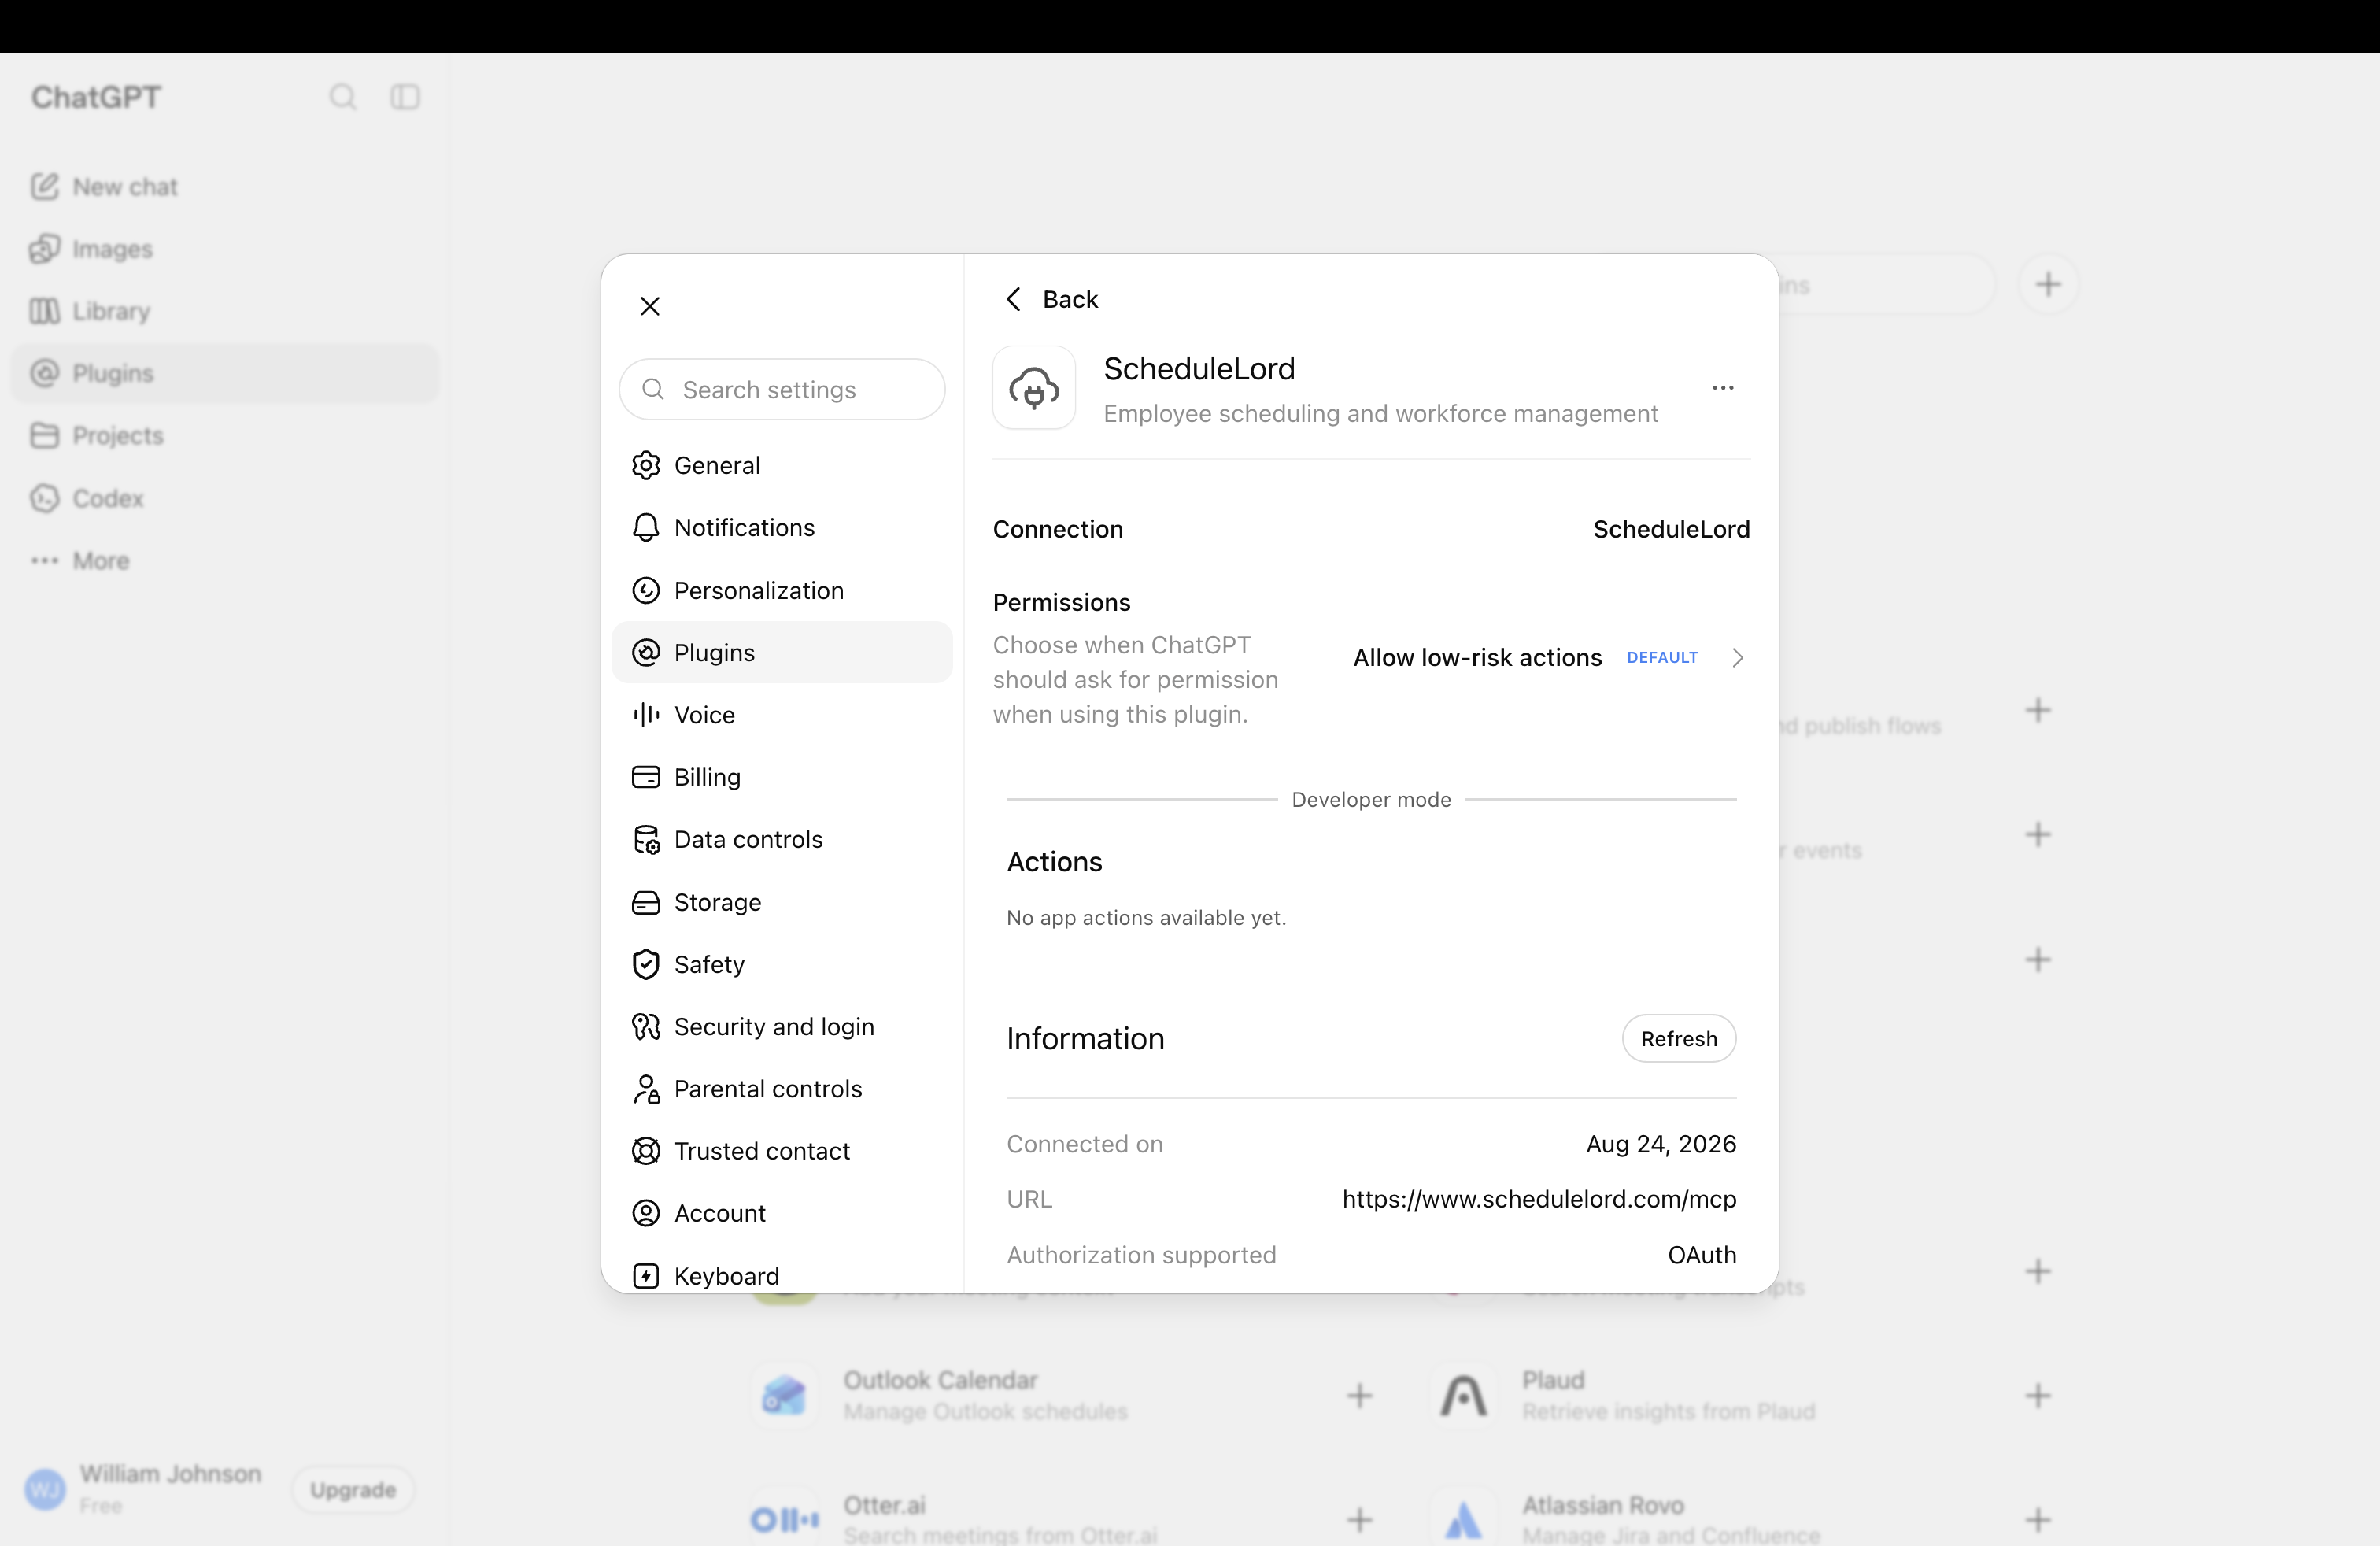
Once connected, the plugin's detail page shows the connection status, permissions, and the server URL it's talking to.
Use it in a conversation
-
Ask ChatGPT about your schedule — for example, "Who's working Saturday?"
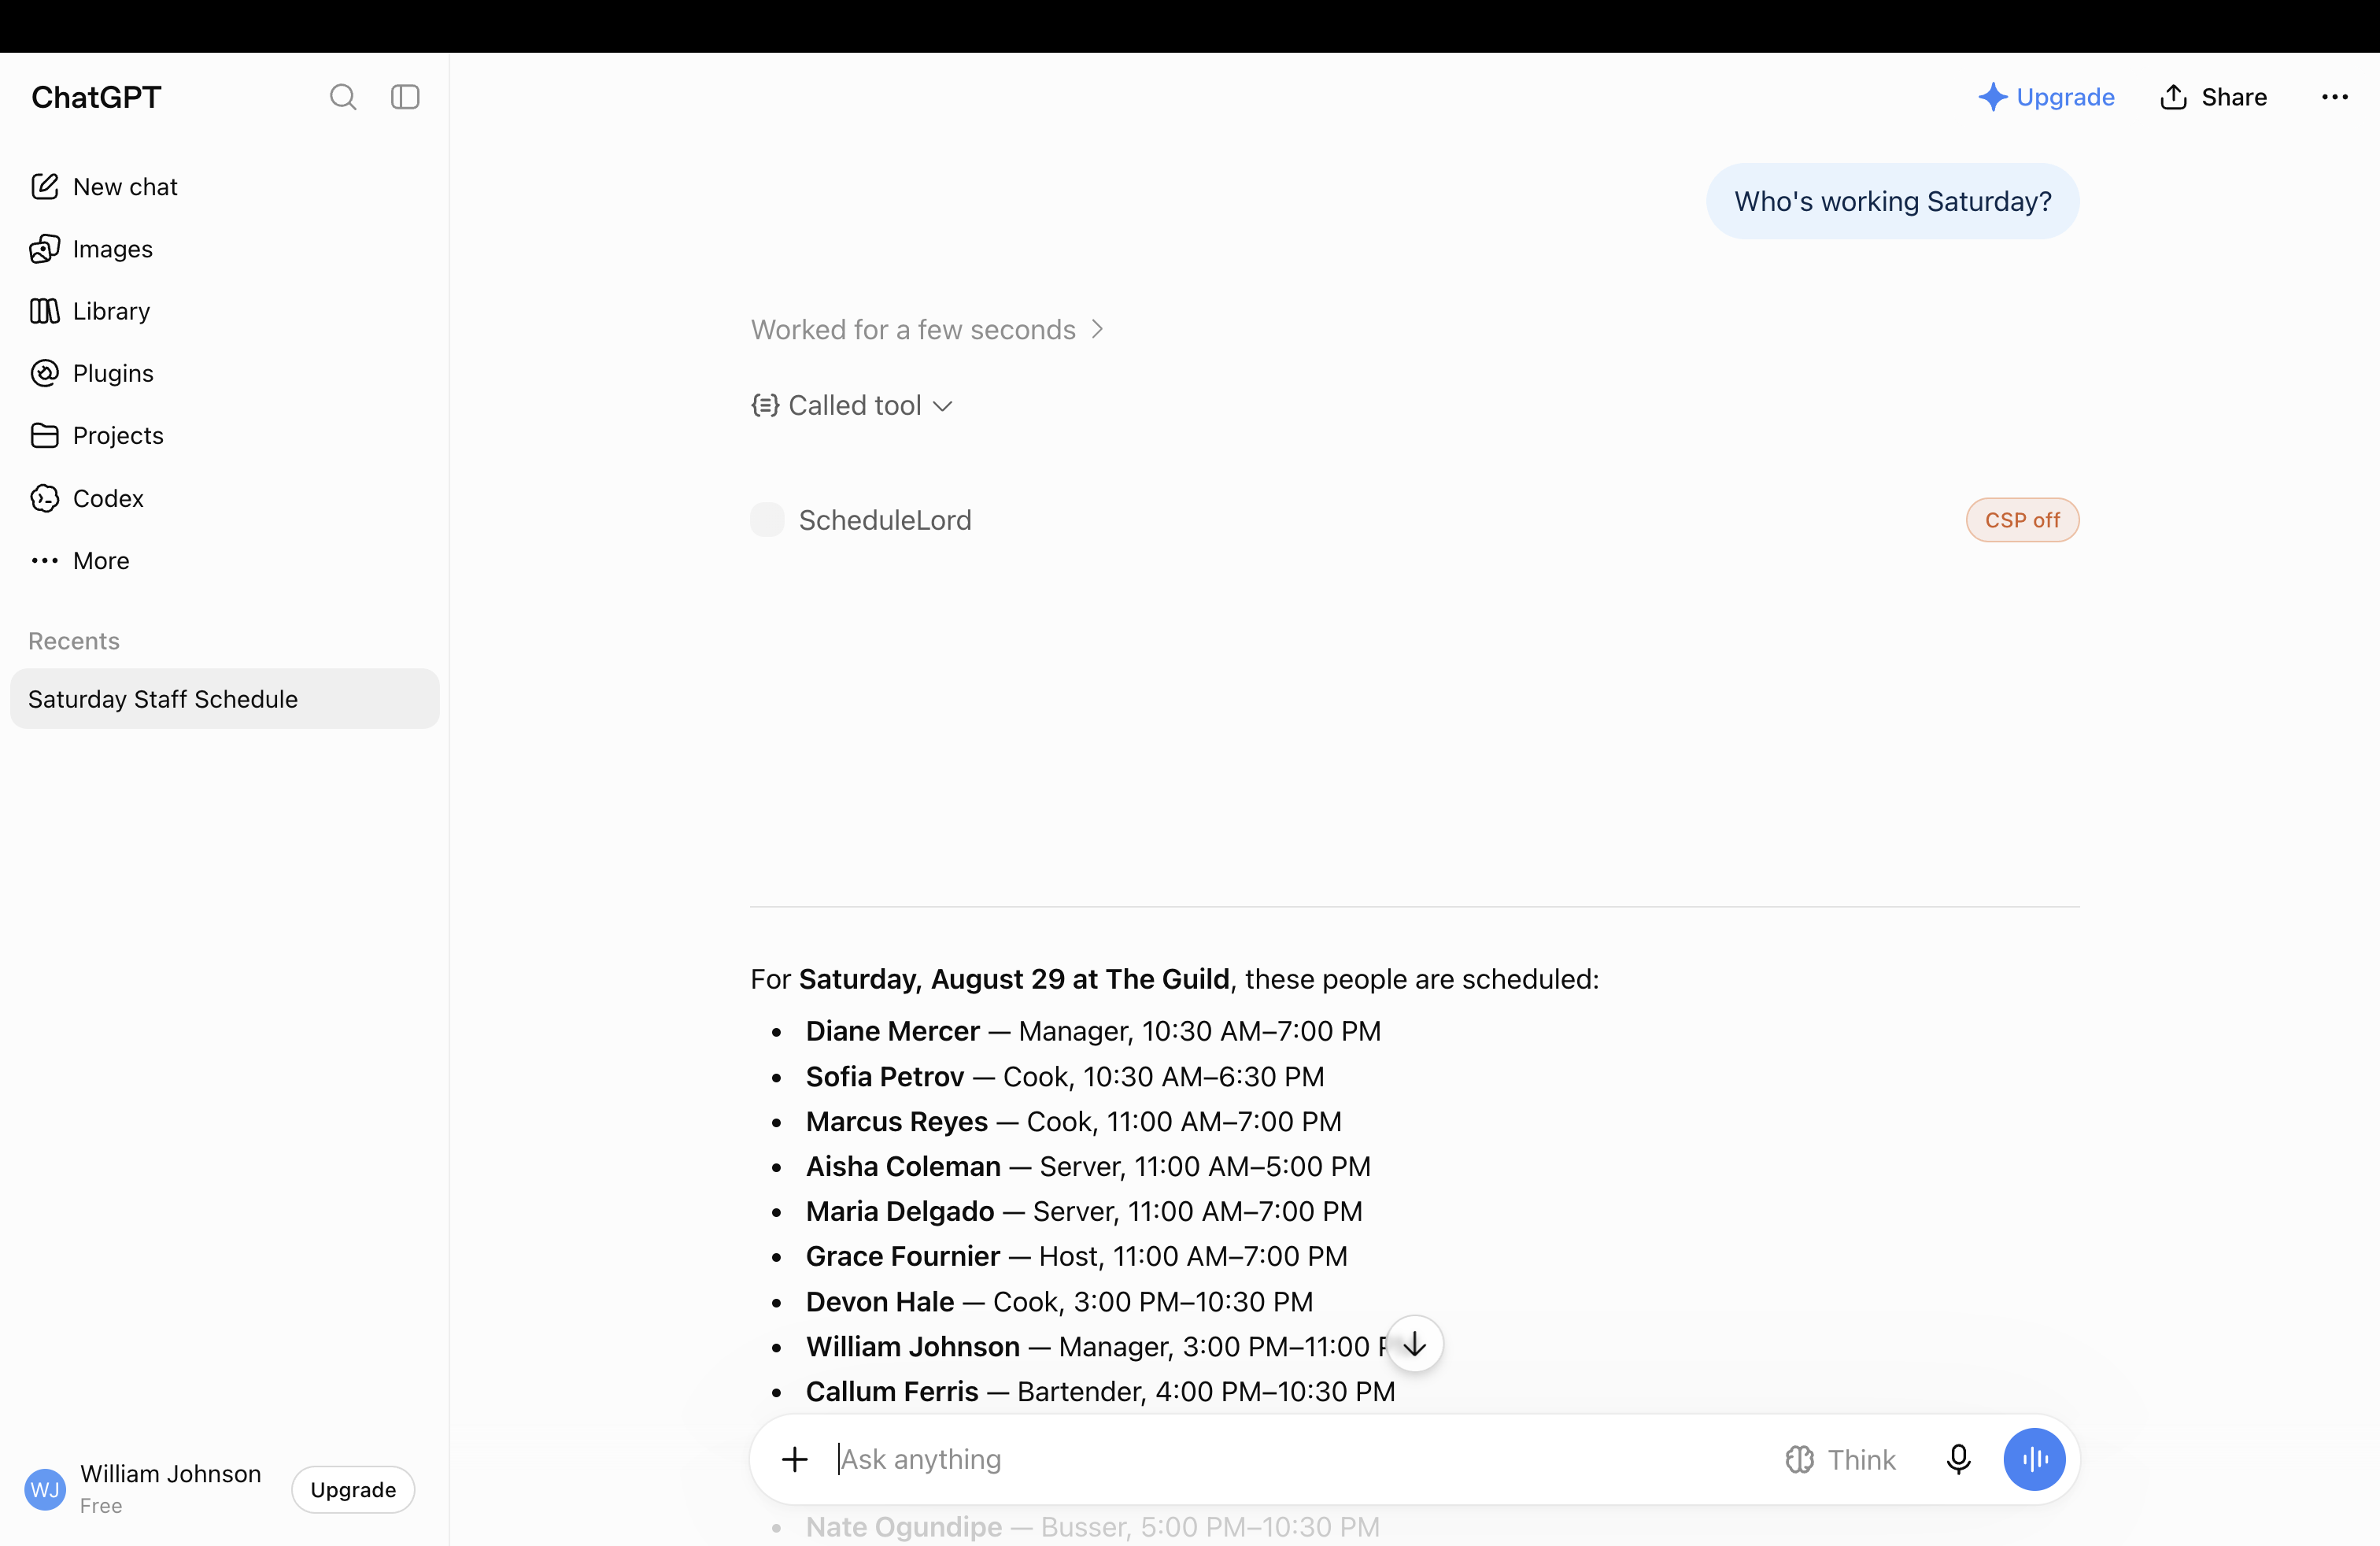
Once enabled, every tool ScheduleLord's MCP server exposes — including ones that write data, like creating shifts — becomes available to ChatGPT in that conversation, subject to confirmation prompts.
Revoke access
Go to Settings → Connected AI Agents and click Revoke next to ChatGPT. See how to disconnect an assistant for details.