Connecting Claude
Custom connectors are available on Free, Pro, Max, Team, and Enterprise plans. Free plan users are limited to one custom connector.
Add ScheduleLord as a custom connector
-
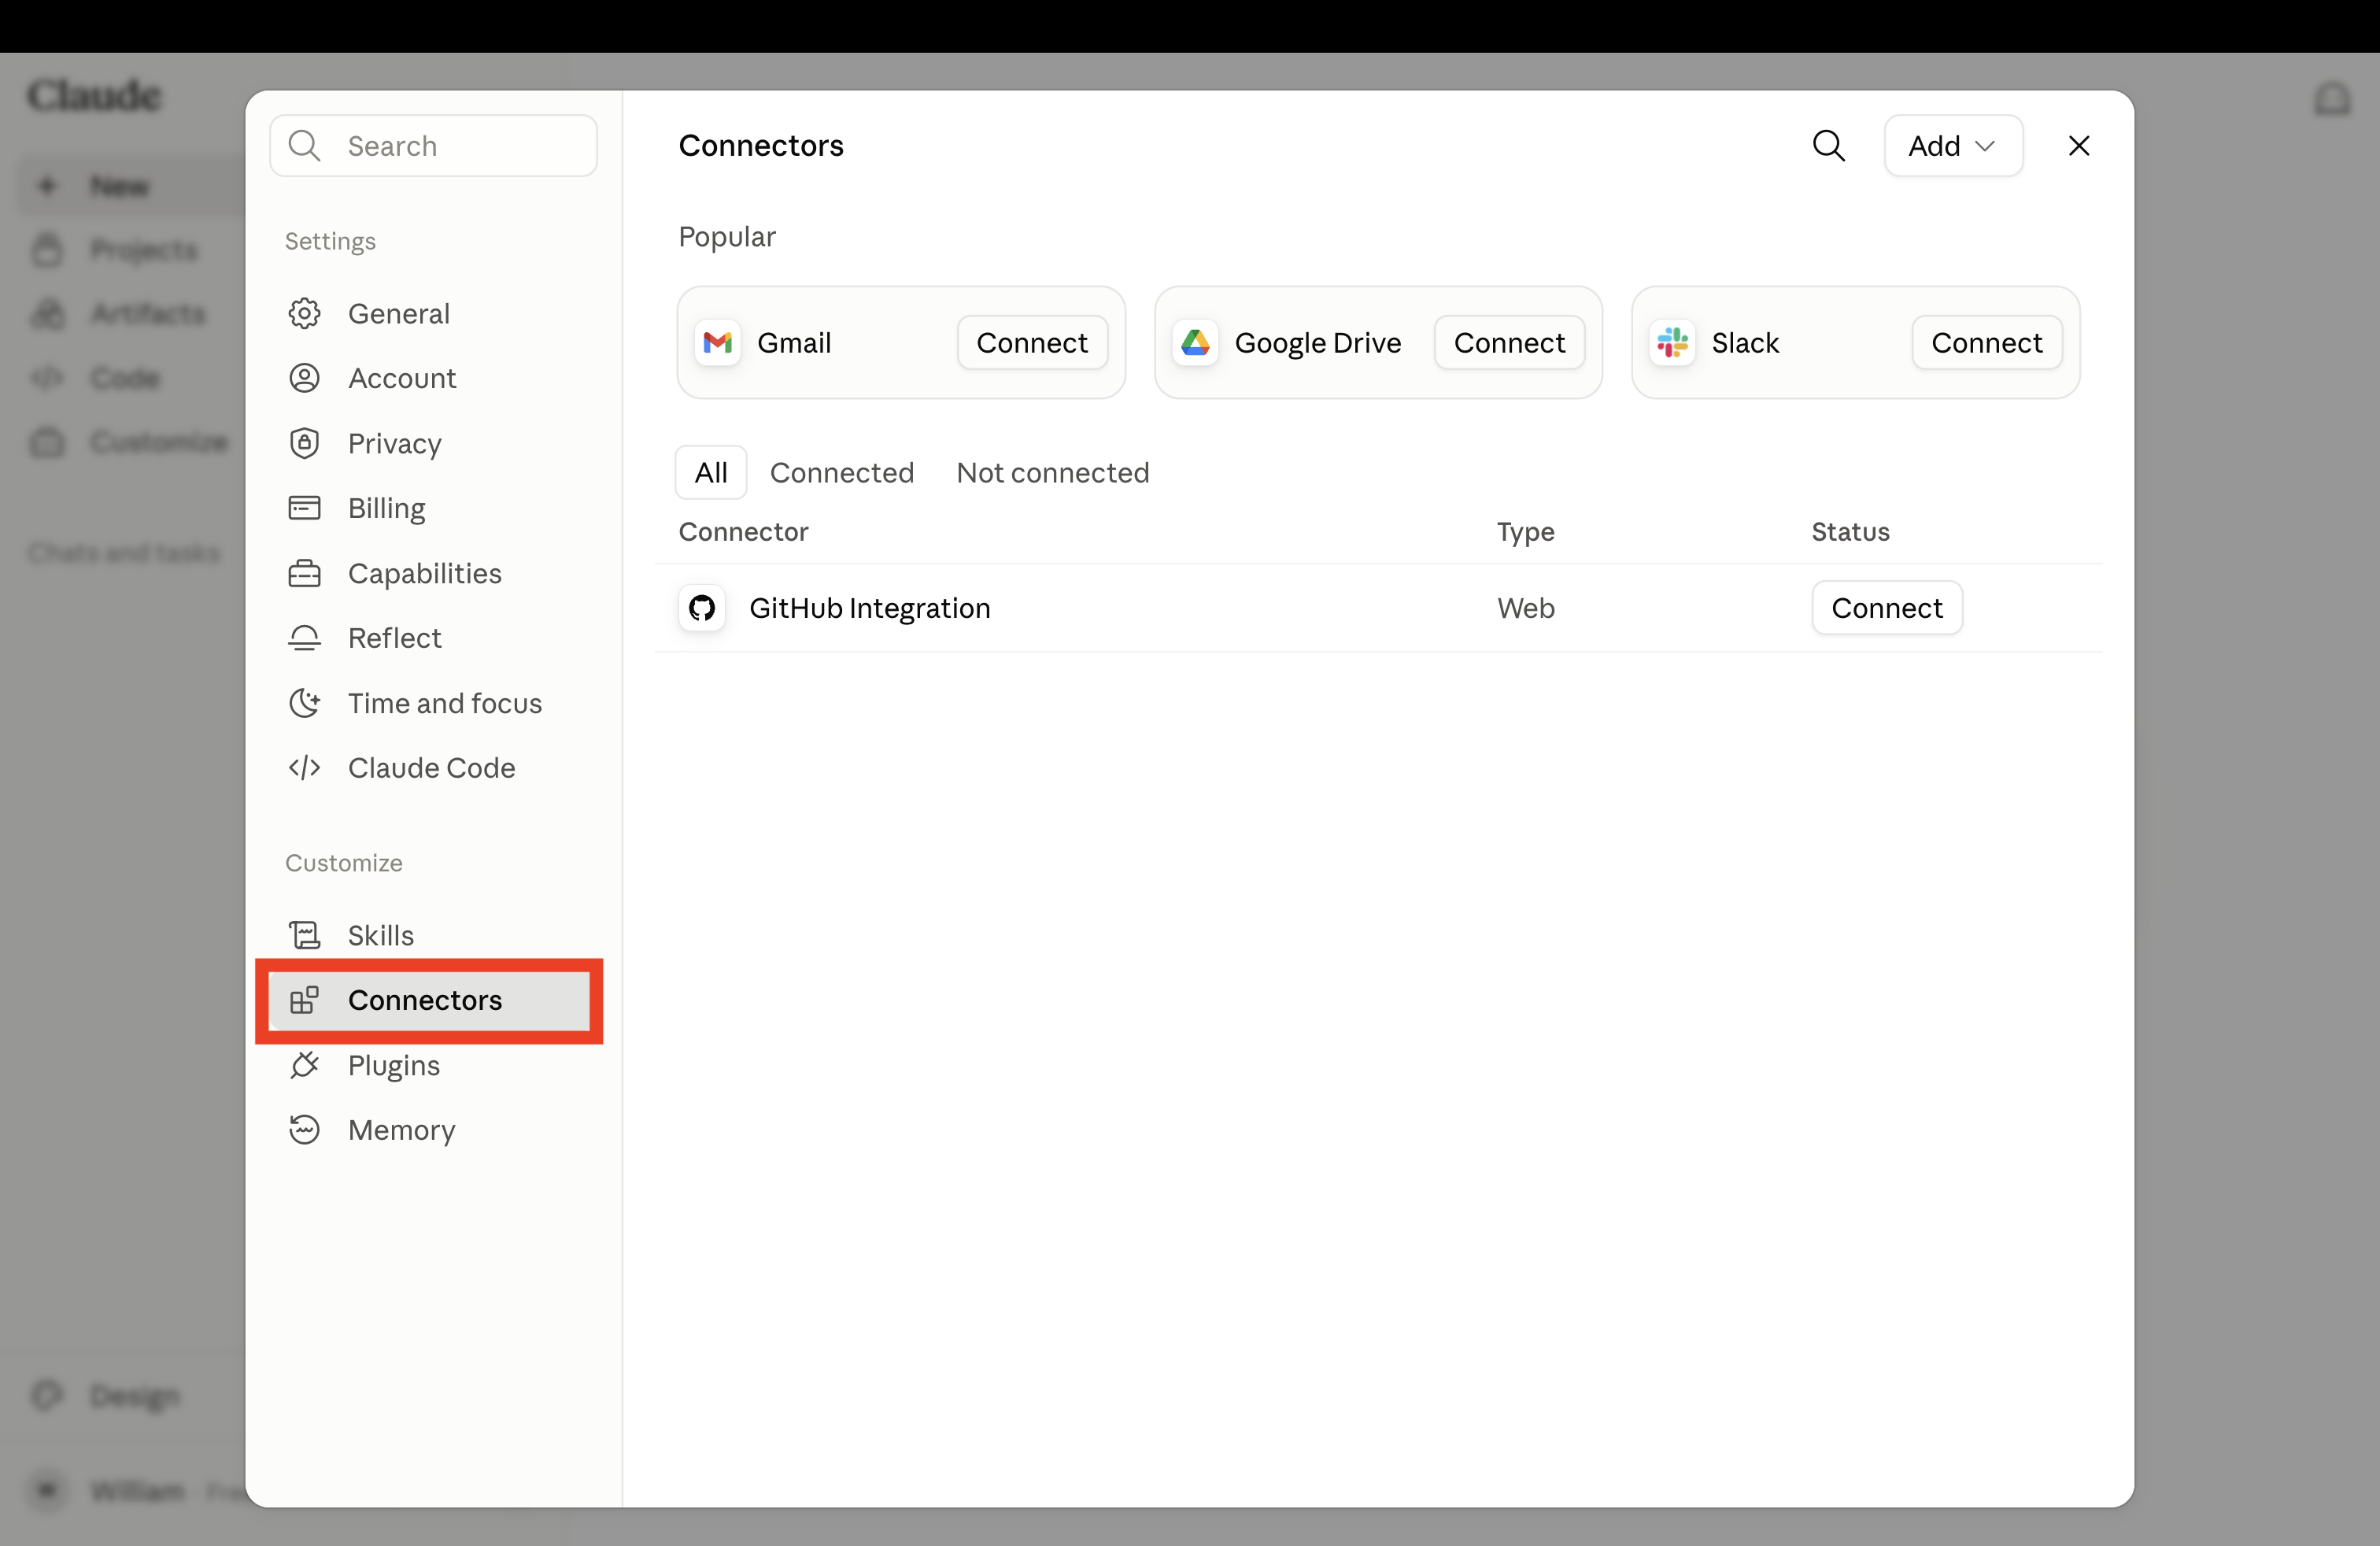
In Claude, go to Settings → Connectors.
-
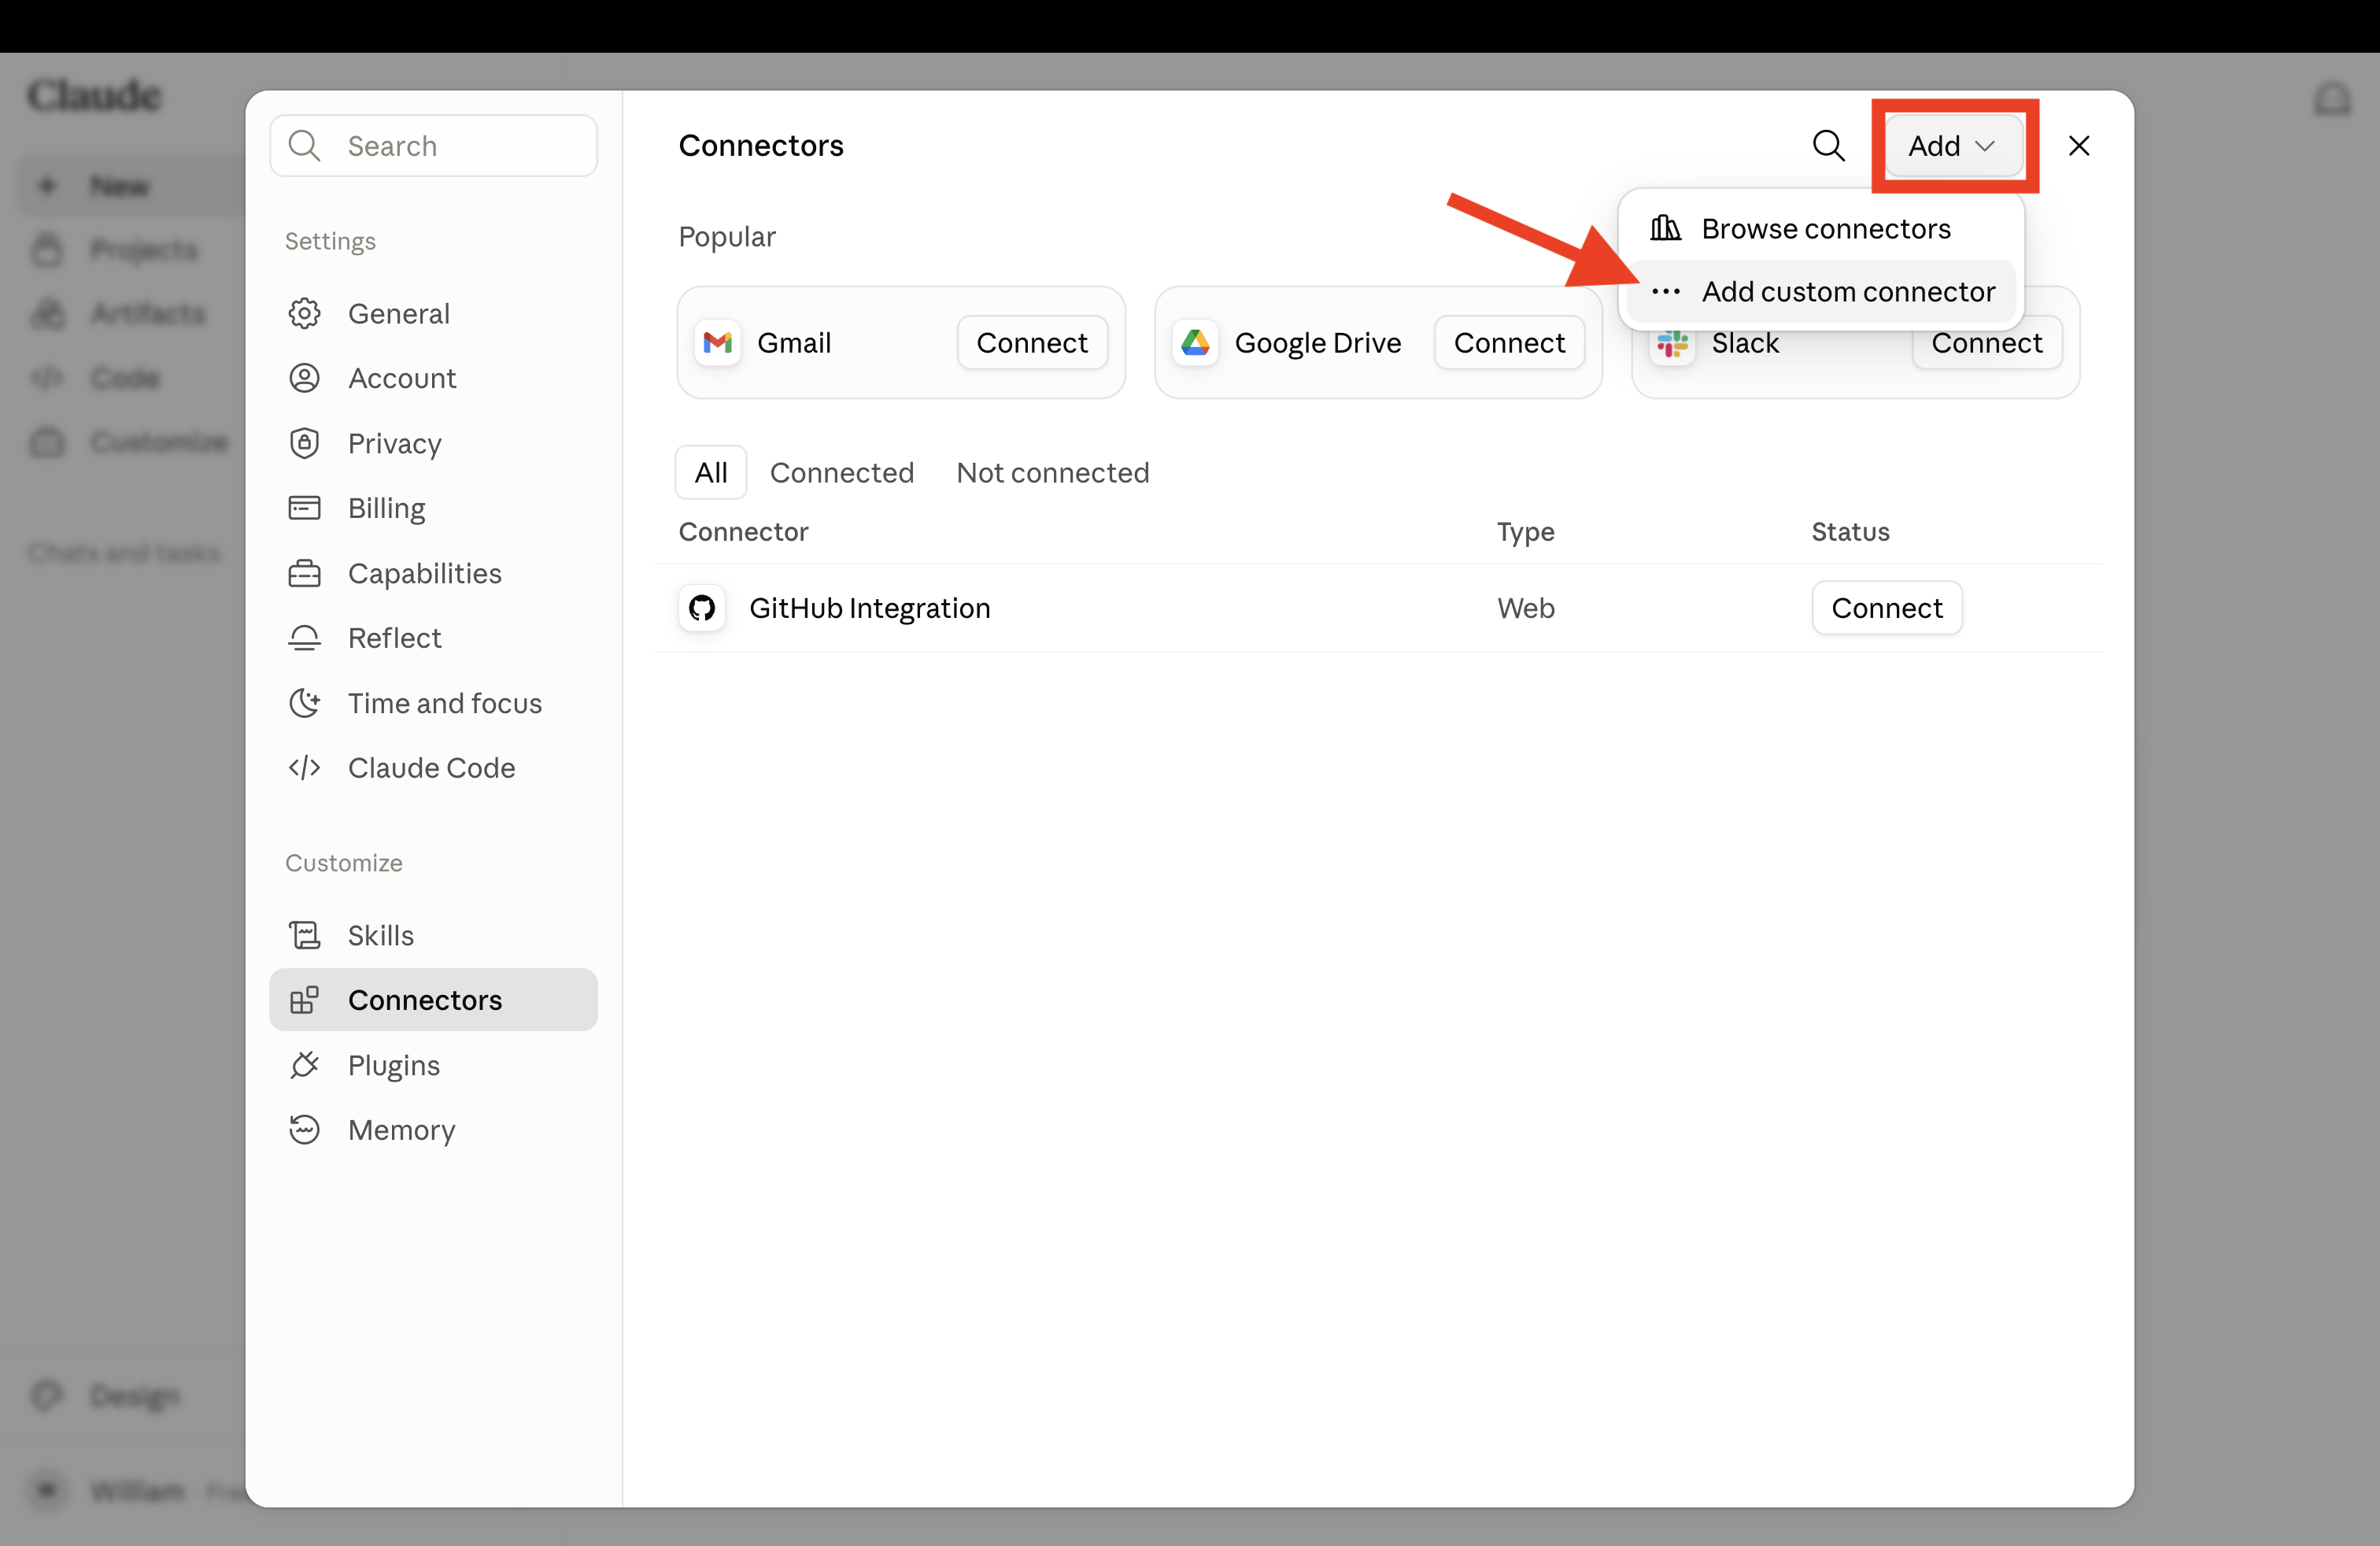
Click Add, then choose Add custom connector.
-
Name it "ScheduleLord" and enter the MCP server URL, then click Continue:
https://www.schedulelord.com/mcp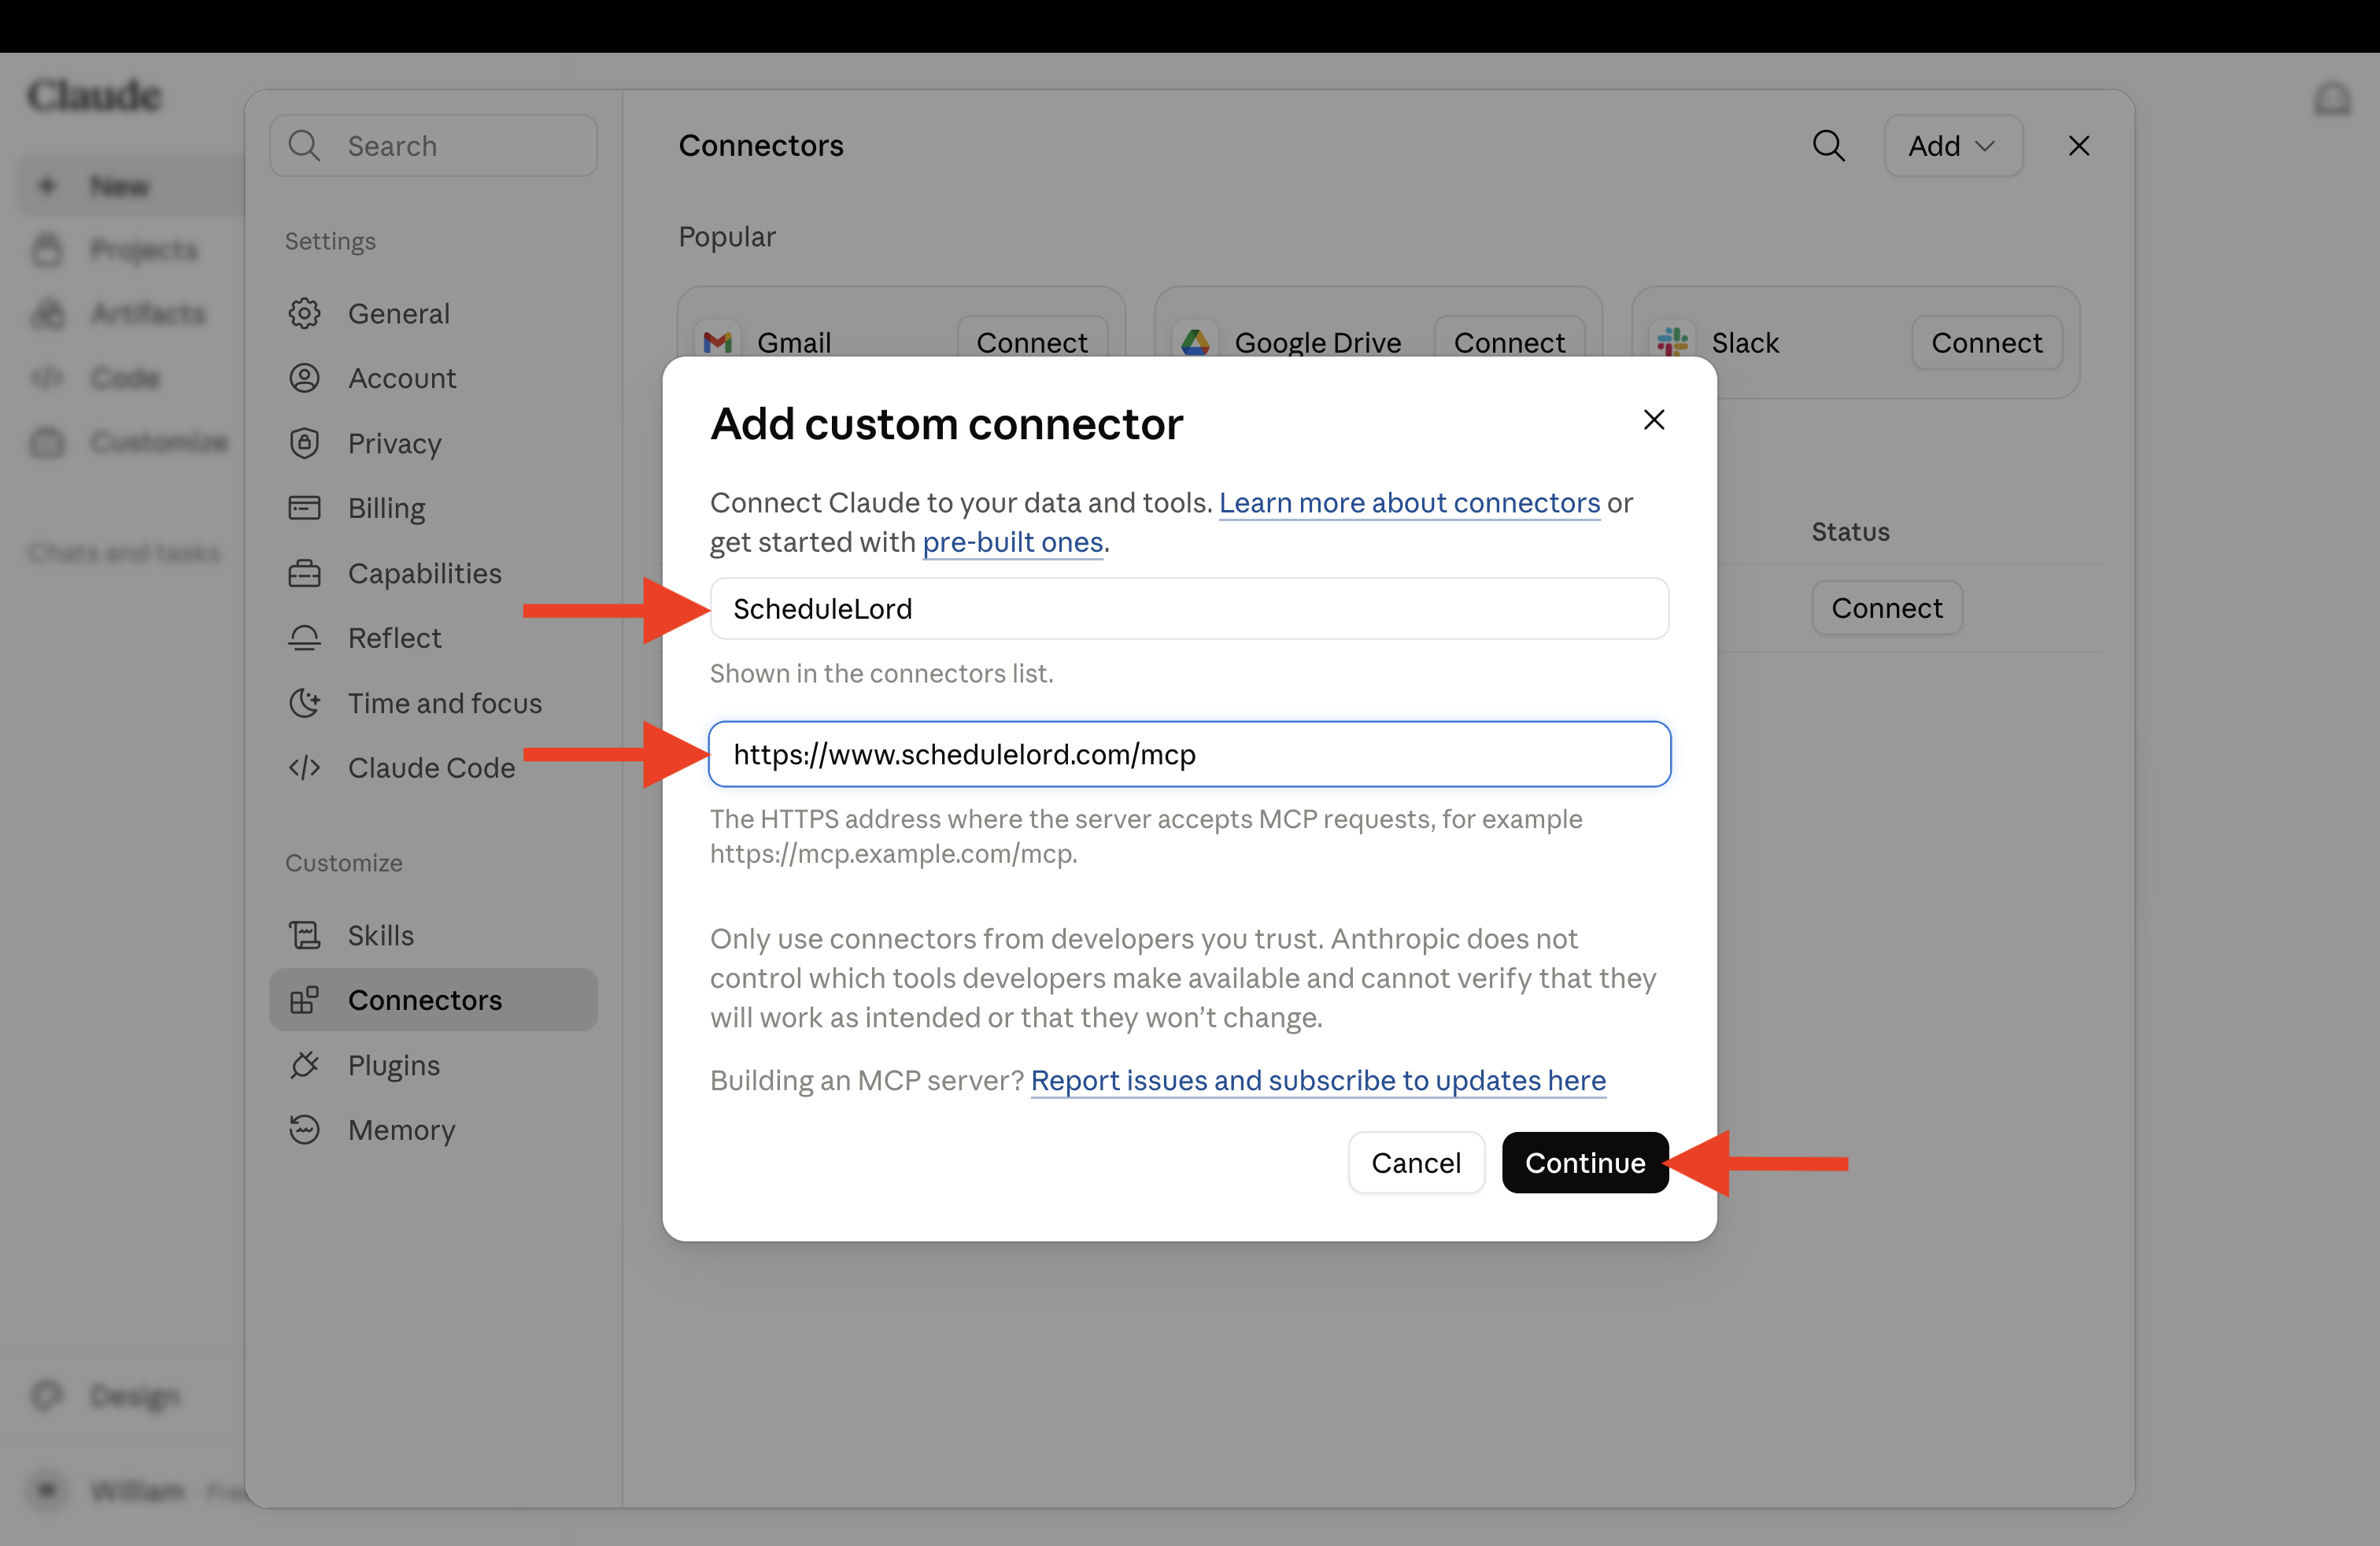
An organization owner must first add the connector under Organization settings → Connectors (Add → Custom → Web) before members can enable it from their own Connectors settings.
-
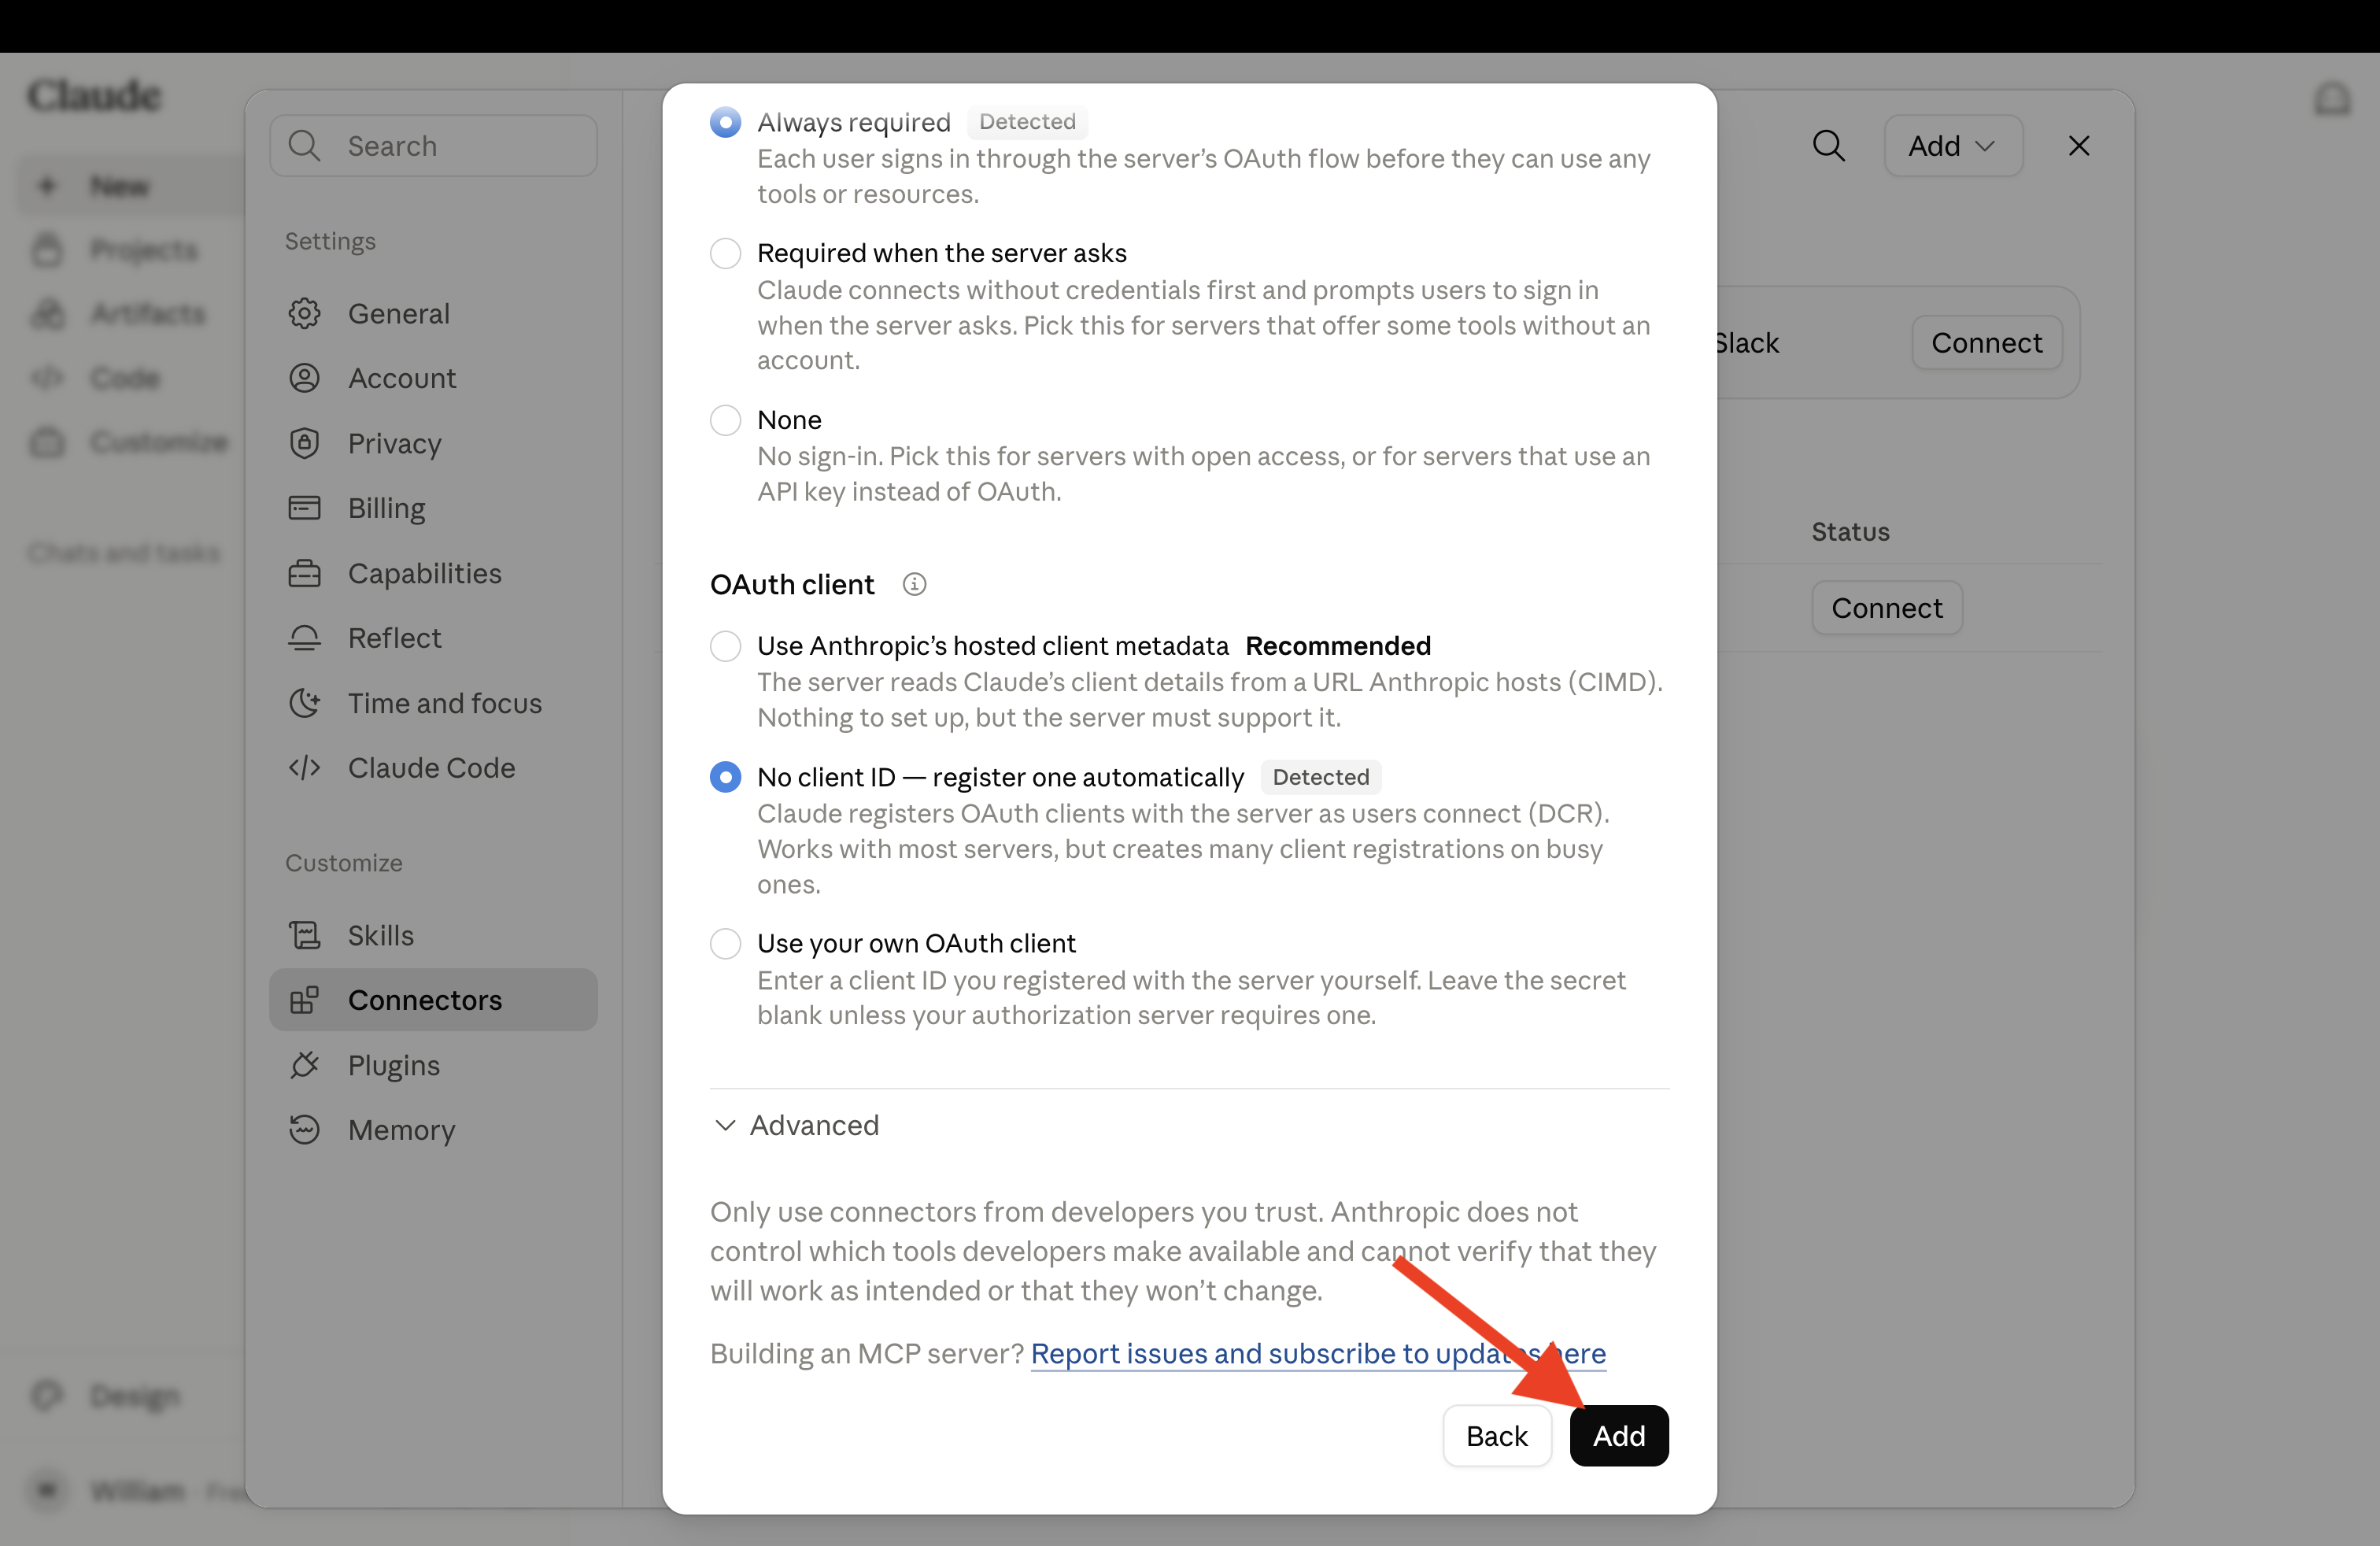
Leave the authentication settings on their defaults ("Always required" and "No client ID — register one automatically") and click Add.
Connect and grant access
-
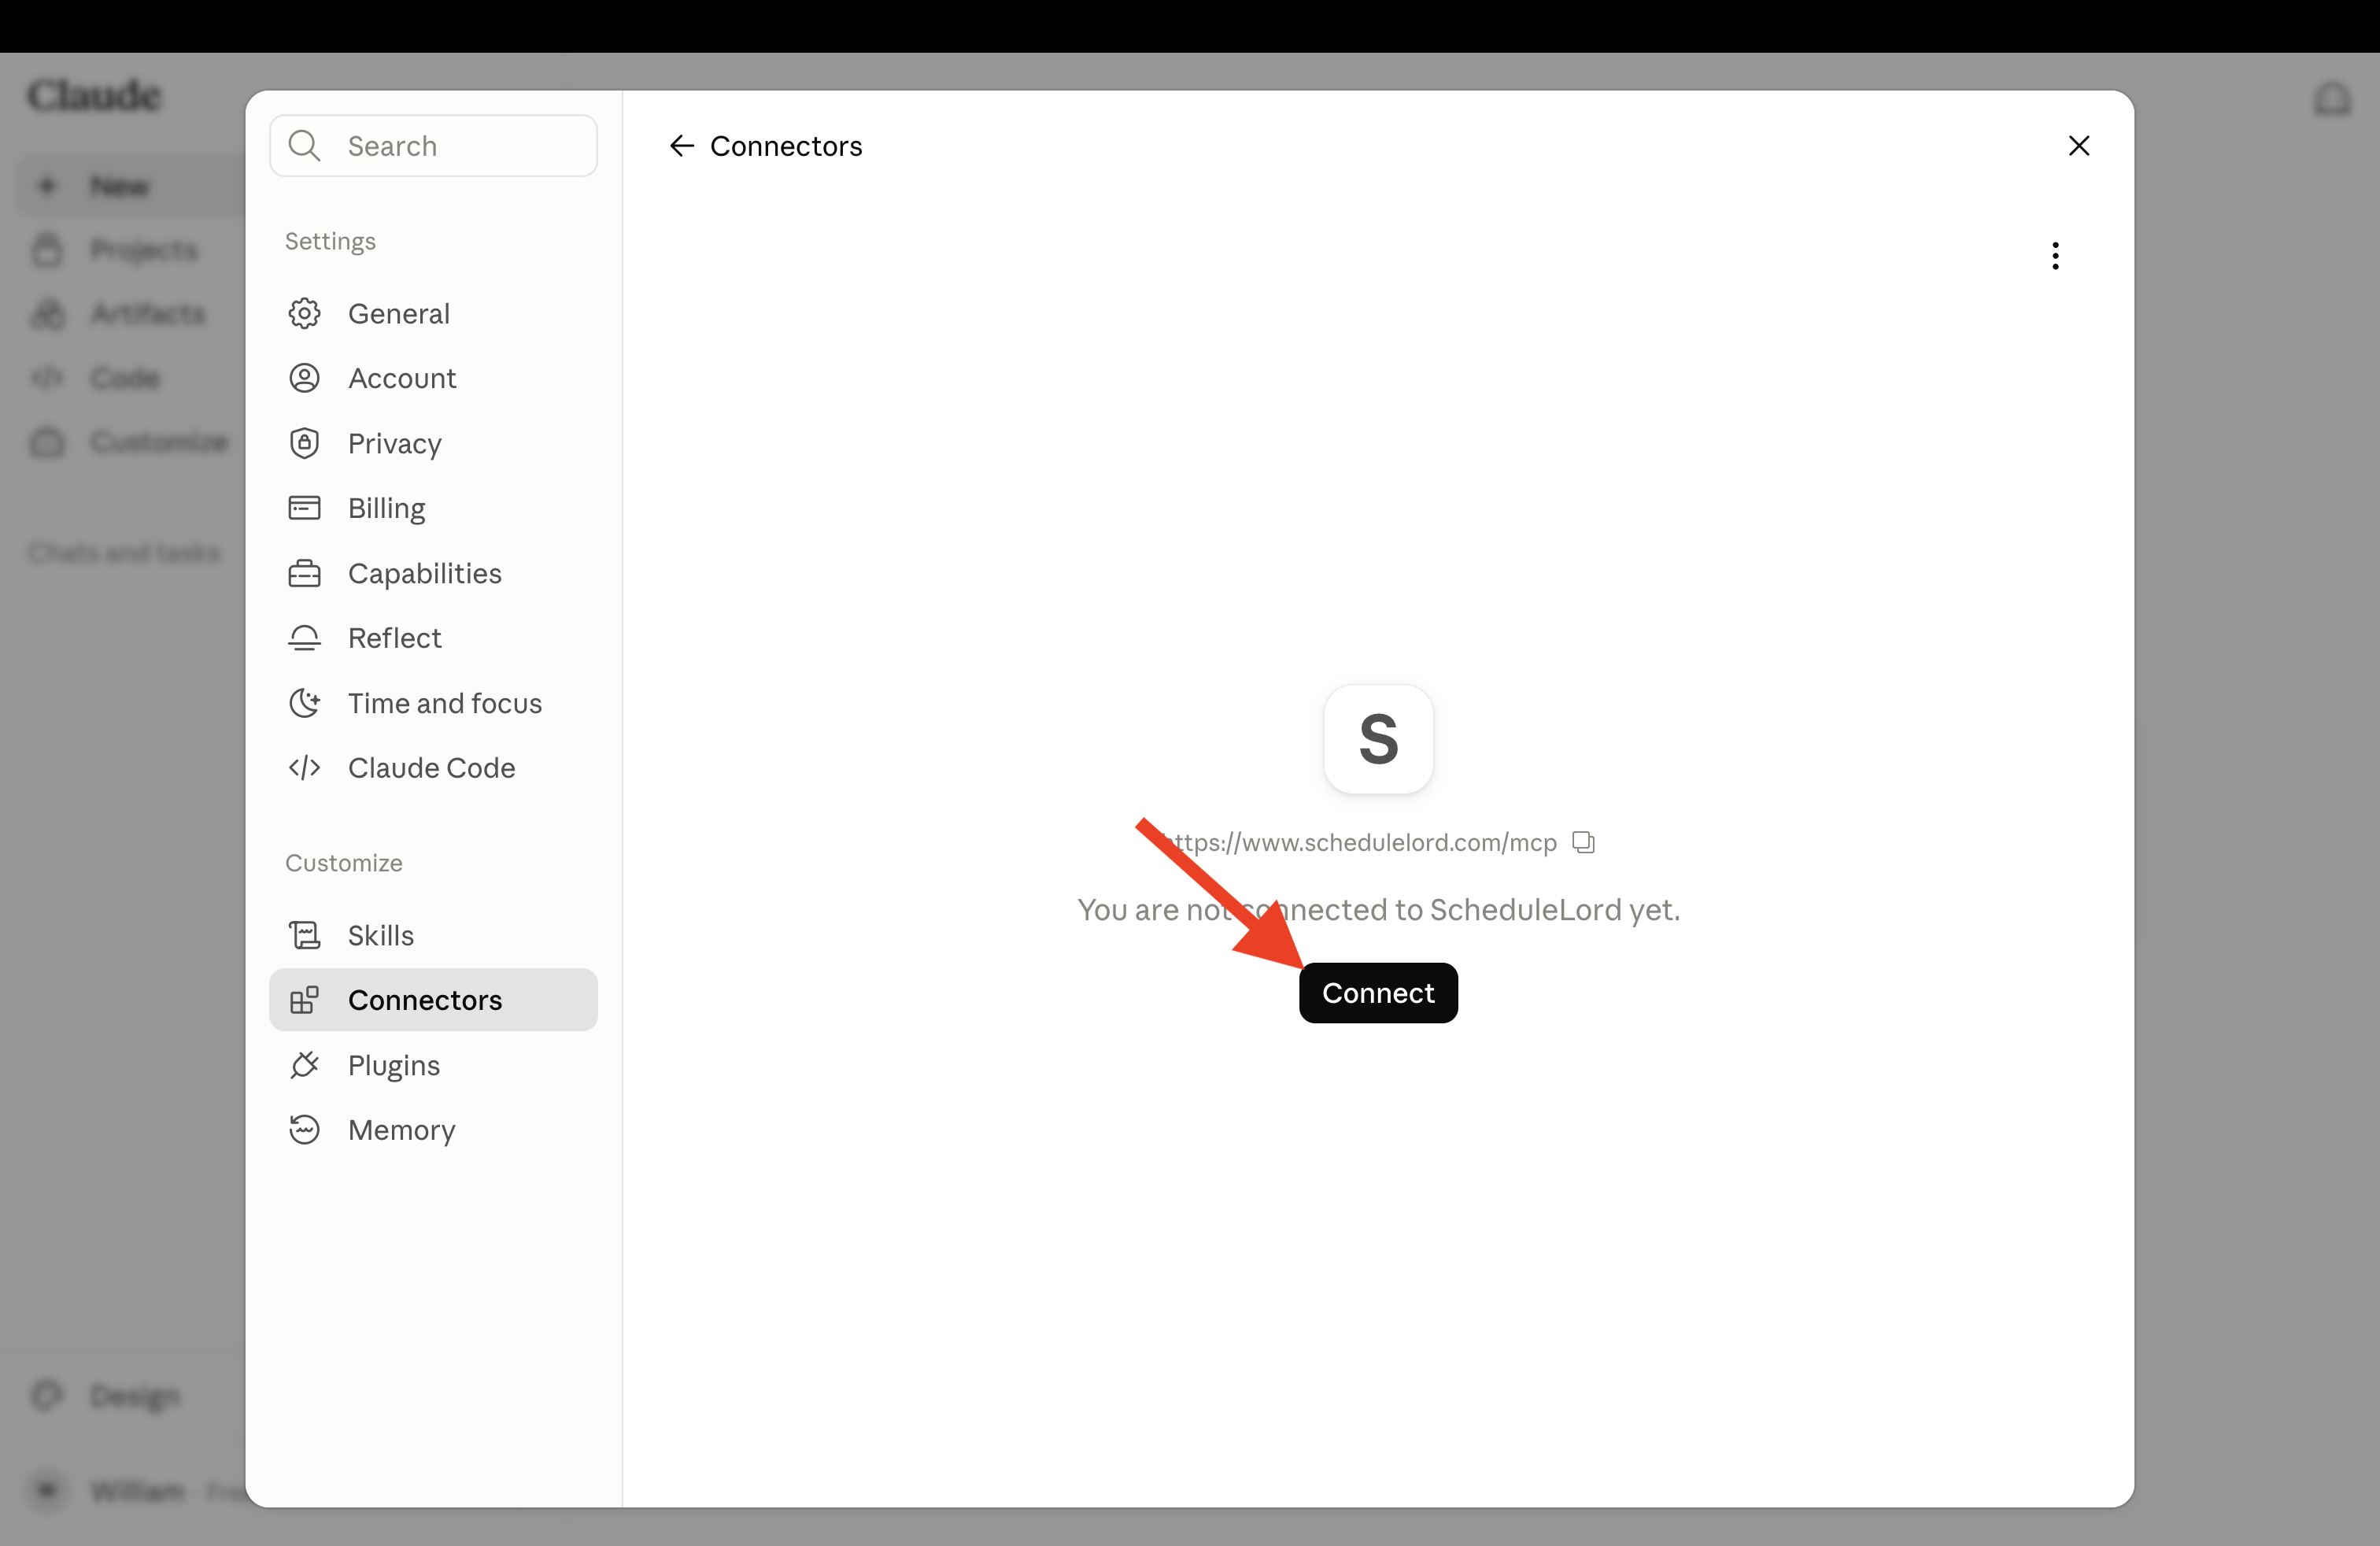
Back on the Connectors page, click Connect next to ScheduleLord.
-
Claude will open ScheduleLord's authorization page. Sign in with your passkey to grant access.
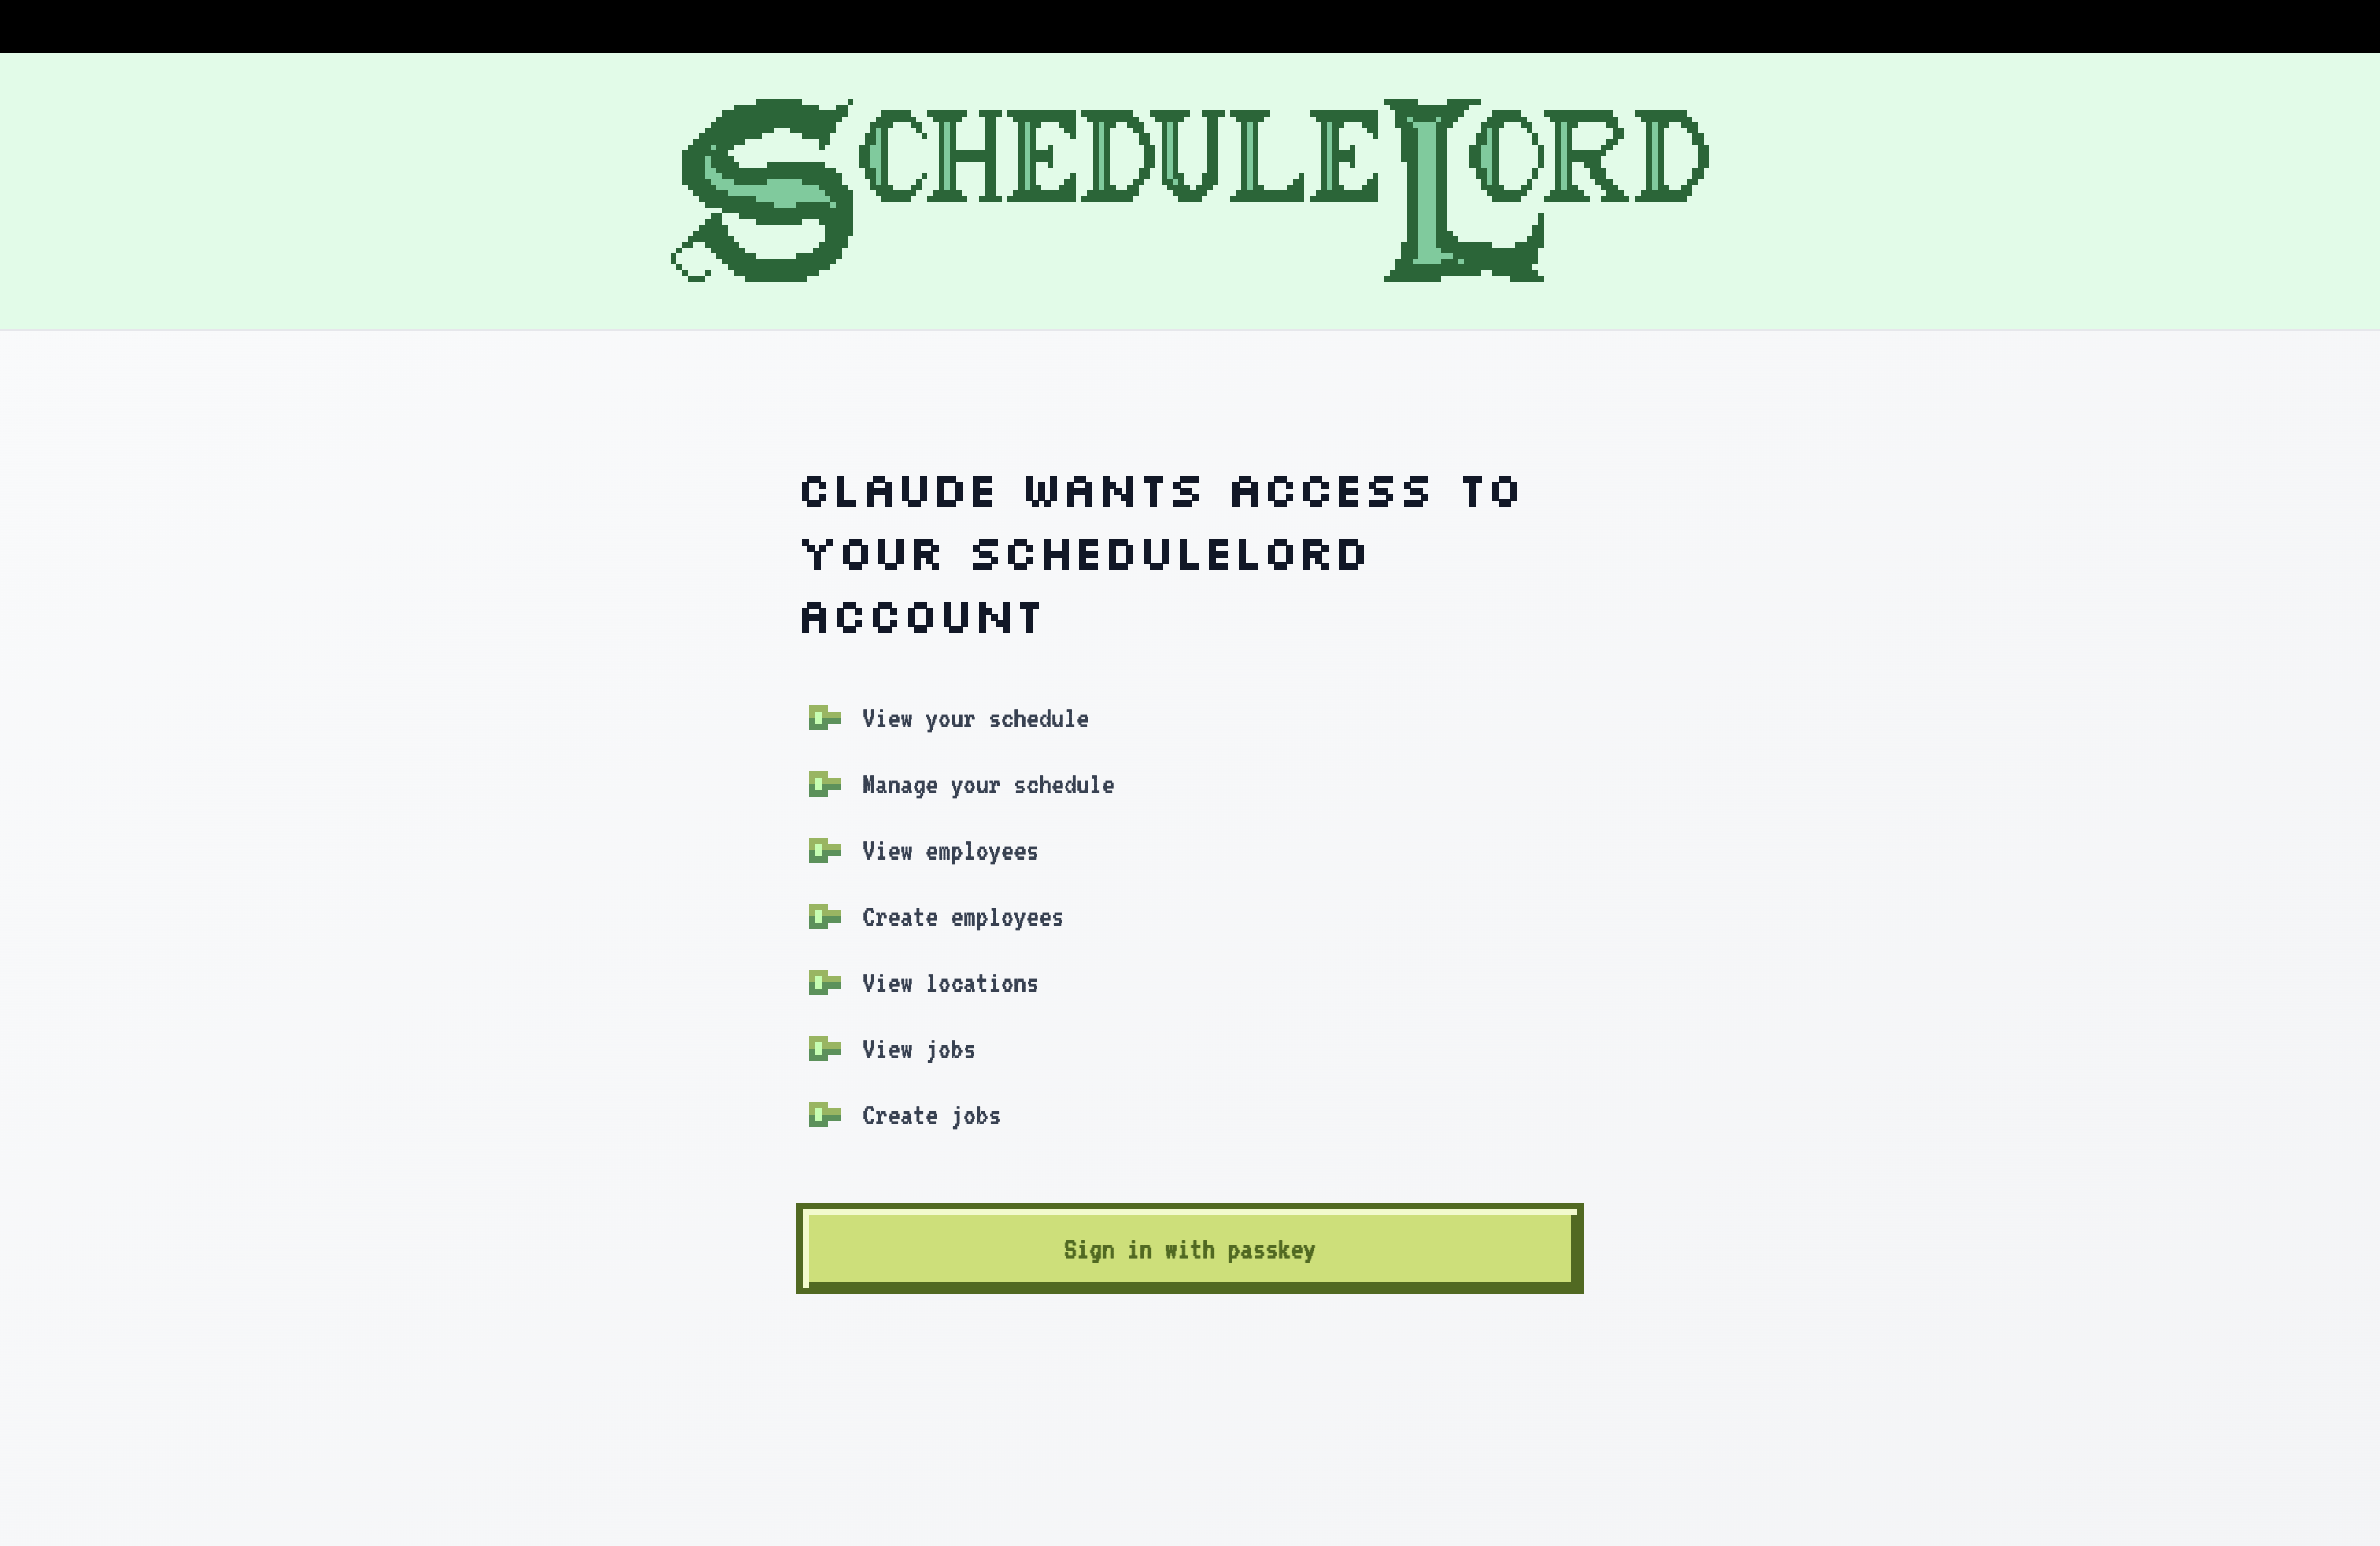
You'll be sent back to Claude, now connected to your ScheduleLord account. This is the same consent screen covered in Client Registration.
Use it in a conversation
-
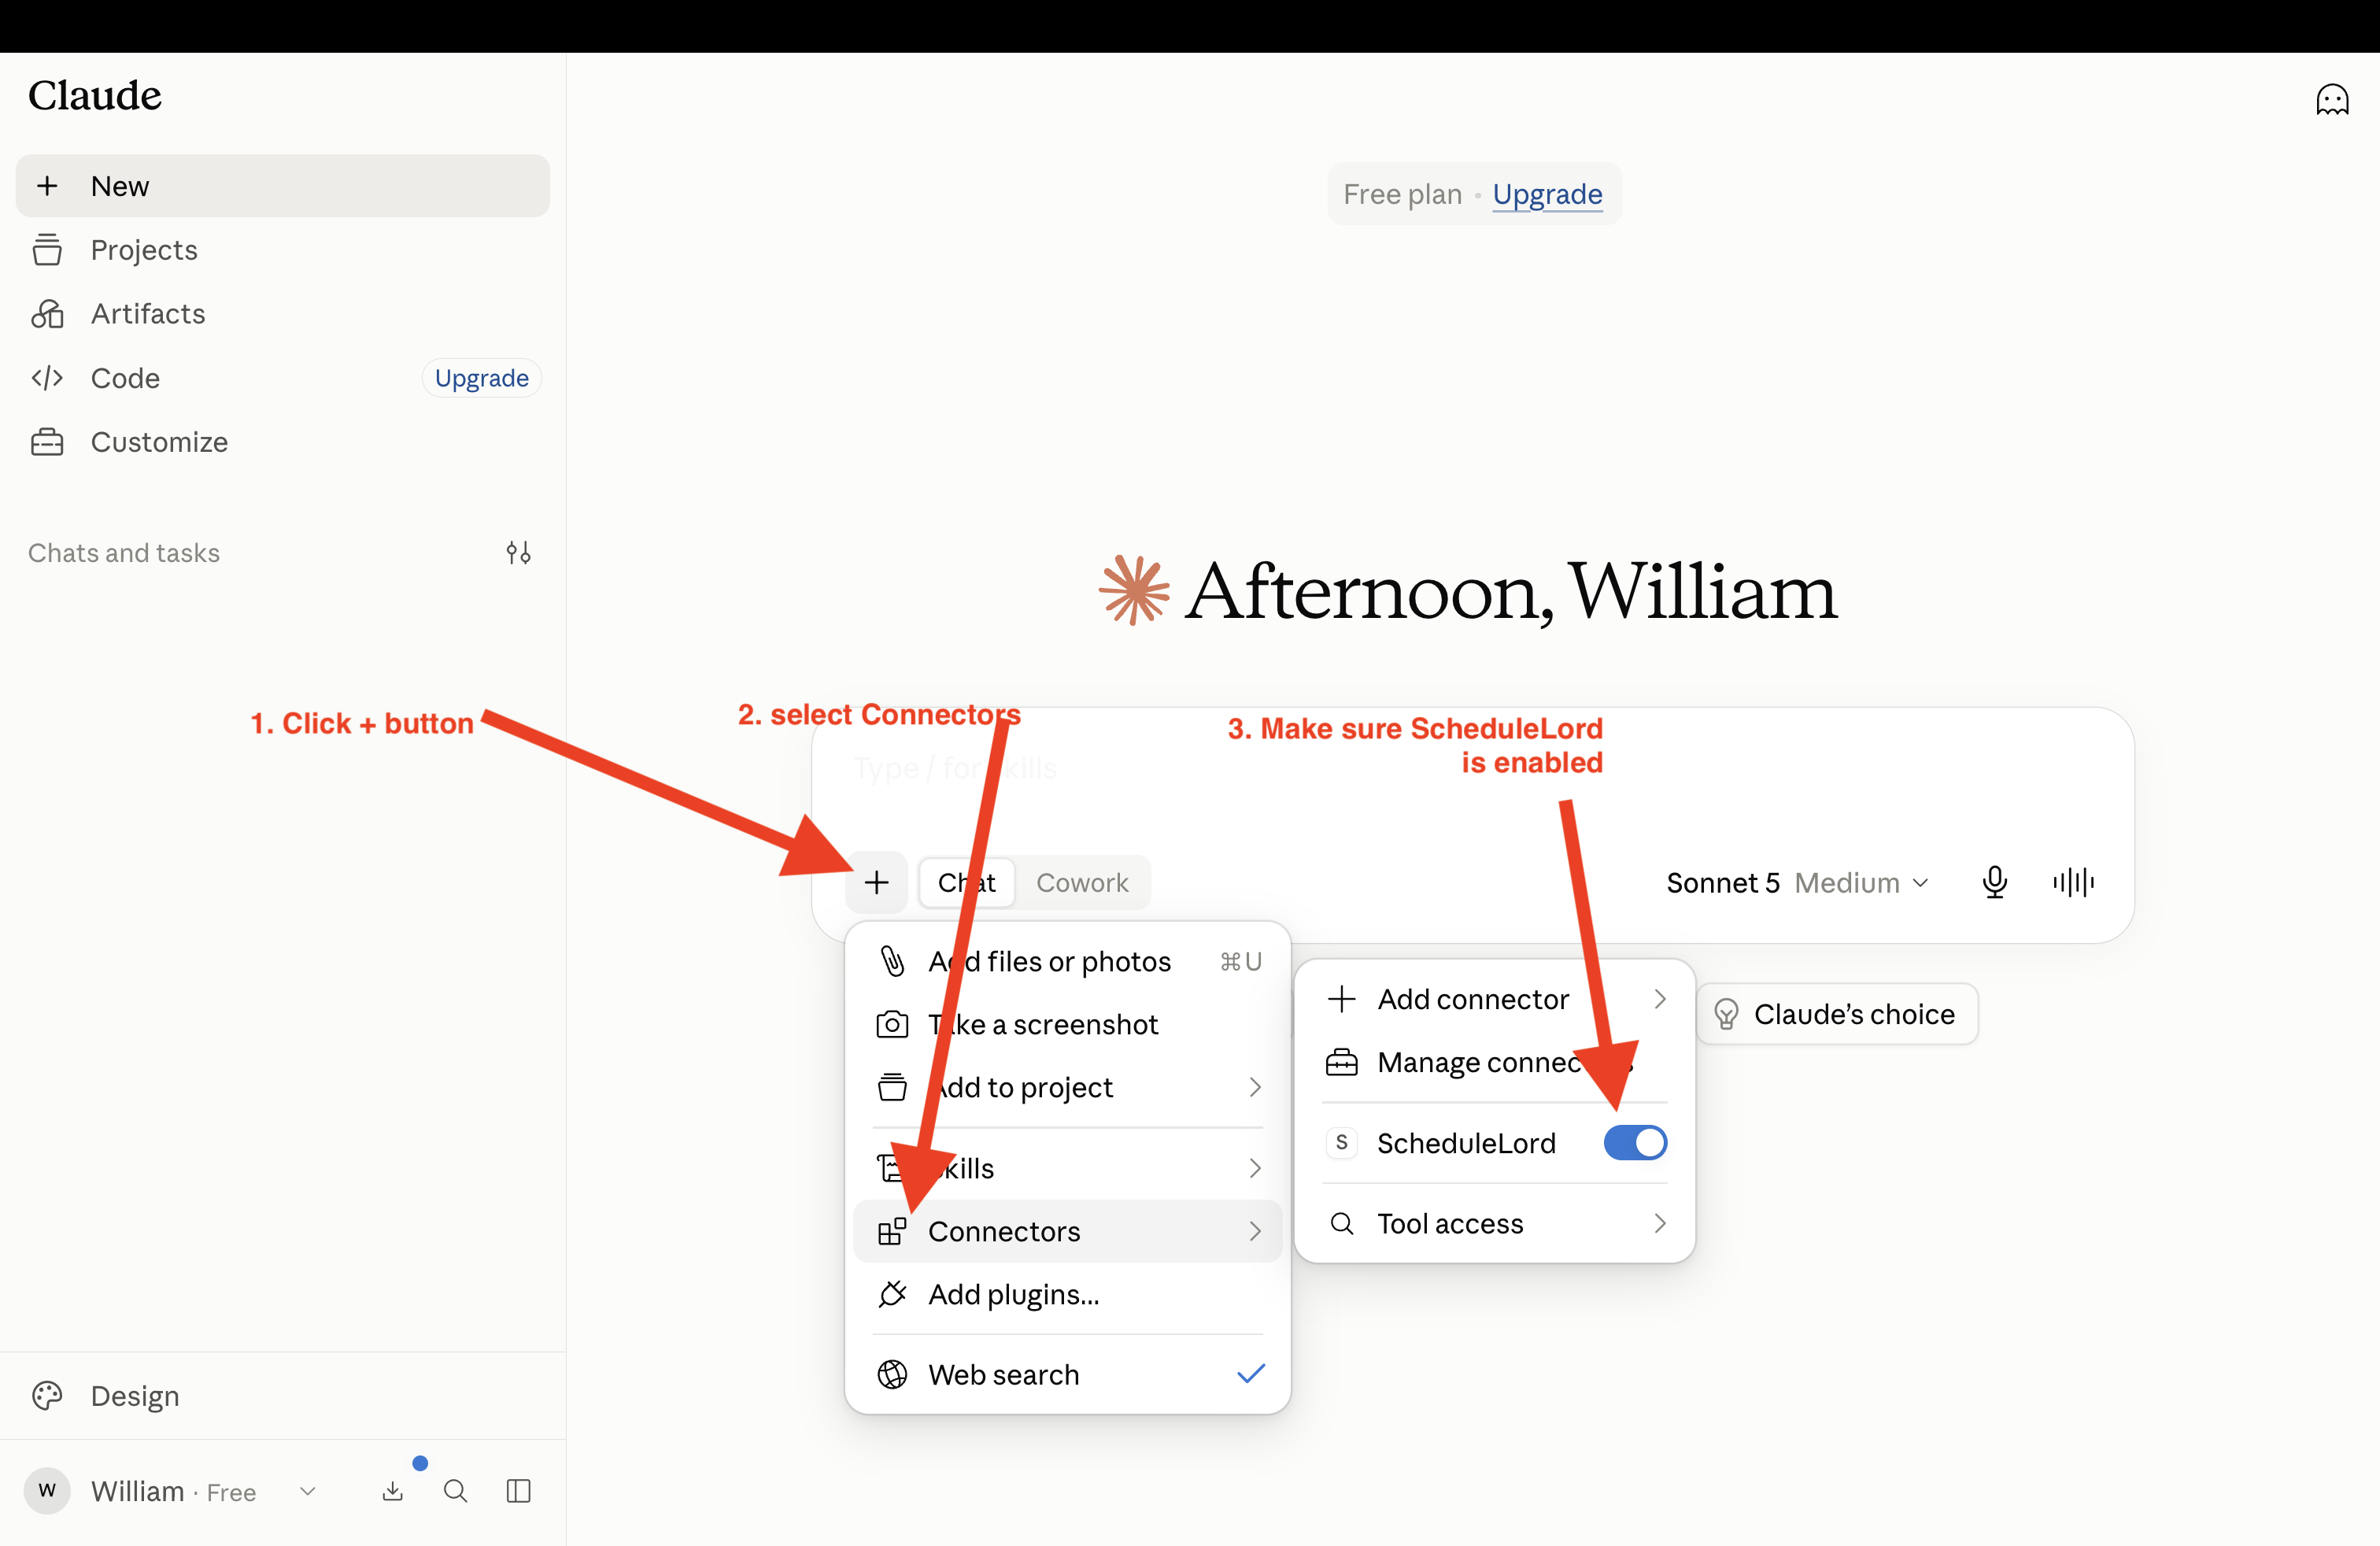
In a chat, click +, then Connectors, and make sure ScheduleLord is enabled.
-
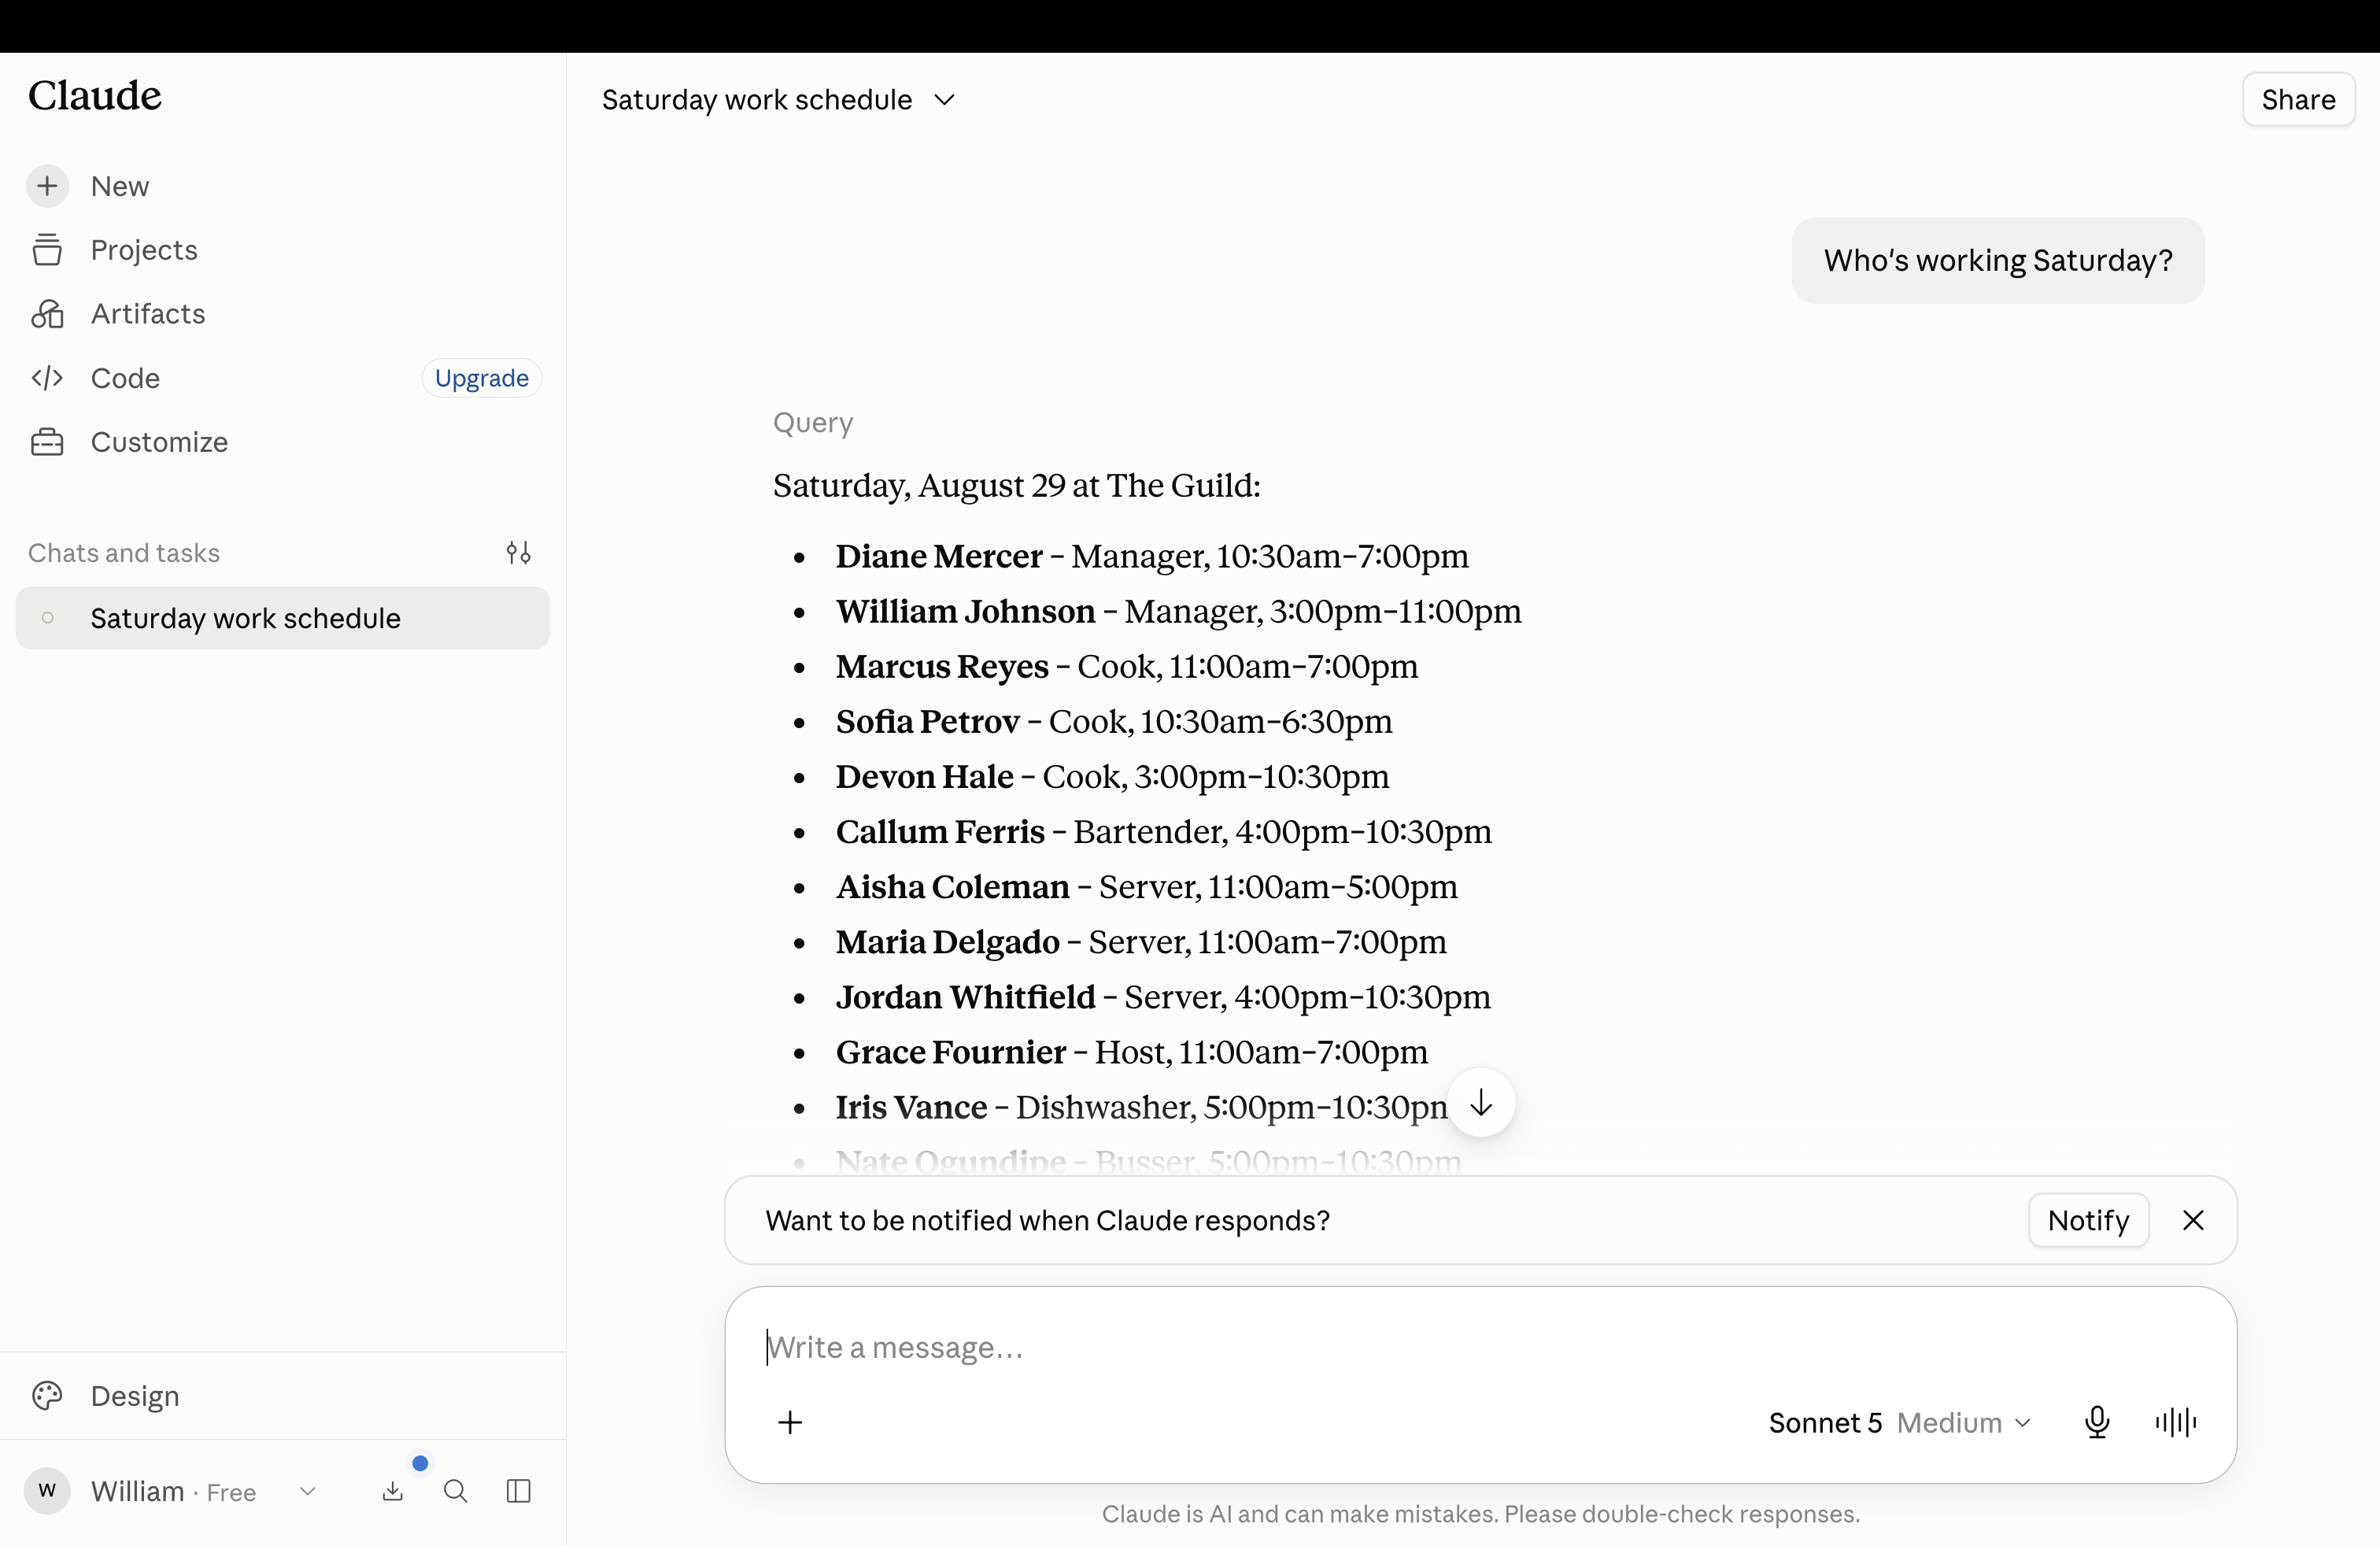
Ask Claude about your schedule — for example, "Who's working Saturday?"
Revoke access
Go to Settings → Connected AI Agents and click Revoke next to Claude. See how to disconnect an assistant for details.